Followers

Saturday 28 April 2018

My 'Butterflies & Roses' 10" x 12" Canvas.

Hello Followers, Friends & Visitors,

Hope you are all enjoying your weekend.   Sue and Mandy's  shows on the Hochanda T.V. today  were just so inspiring.    Fabulous techniques with great products and the design team made some gorgeous  samples and there are more programmes tomorrow Sunday 29th. April at 10am. & 2pm.  hope you can tune in.

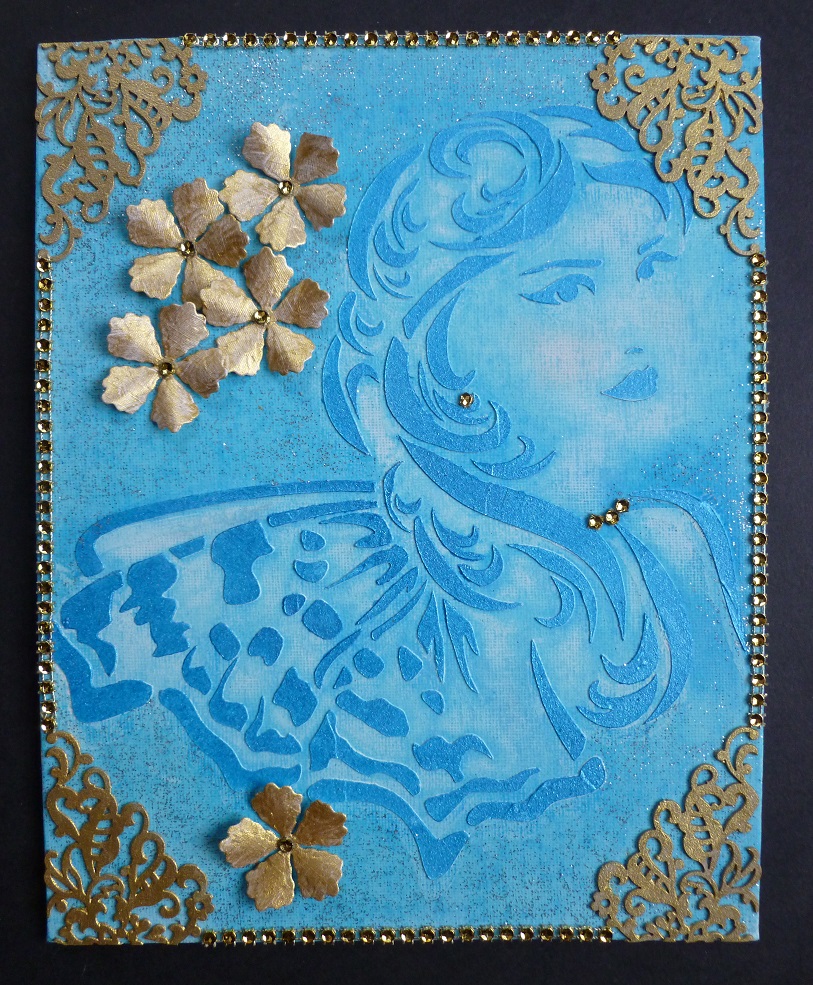
I would like to share my large fairy canvas with you all tonight.   Please bear with me as there are quite a lot of stages and photographs.   I really enjoyed myself decorating this canvas, as fairies are one of my favourite subjects to work with.

 
Using the canvas in a portrait style, paint it with the mint, lilac blue and pink sunset Starlight paints, making stripes across the canvas, blending the colours as you go.

         
When dry, lay the  A4  fairy rose stencil onto the canvas securing it with masking tape or Crafter's Companion Stick & Spray.    Spread the Dark Orchid Texture paste over the design, using the metal spatula.


Remove the stencil and leave the image to dry.   Clean and dry the stencil and lay it back on the dry image.  Mask off the parts of the fairy nearest to her wings, then spread a thin layer of the Platinum Texture Paste over her wings only using  the metal spatula.   Remove the stencil and wash it.

   
Lay the stencil onto a piece of white card and once again, spread the Dark Orchid  Texture Paste over the fairy's body and her right leg only.  Remove the stencil and leave image to dry.


When dry, cut her out and glue her onto the original image on the canvas, using silicone glue.

  
Colour some white card with the White Gold Starlight Paint and when dry. die-cut five  flourishes from it using the JustRite die.   Glue two to the right and two to the left sides of the canvas, the ones on the right slightly lower down than the ones on the left,   put the fifth flourish aside for the moment.


Die-cut seven roses from maroon coloured card, roll up and glue, then add some White Gold Starlight Wax on the tips of the petals.

  
Glue three roses  to both sets of flourishes, using Magi bond glue.   Lay the Weather Wash stencil over the bottom of the canvas and spread a little silver  glitter Texture paste over the stencil to look like sparkling water.
 
Spread the white Texture Paste across the bottom of the canvas, higher at each side than in the middle.   Add some Artsy Stones whilst the Texture Paste is still wet.


When dry, add some Malahit Texture paste over the White Texture Paste and Artsy Stones, using a stencil brush.


When dry rub some White Gold Starlight Wax over the surface of the Artsy Stones.

  
Glue the fifth flourish and and the 7th. rose to the bottom of the canvas.

Die-cut four corners from some maroon card, using the Crafter's Companion corner die and colour these with White Gold Starlight Wax.

        
Glue one in each corner of the canvas.   Rub a little of the Silver Glitter Texture paste over the fairy's wings and the canvas is now finished.   I do hope you are still with me lol!   I do realise this is a very long blog  but I do like to show you all the different stages.   Thank you for taking the time to read this to the end.   Enjoy the rest of your weekend and please don't forget to tune in tomorrow (Sunday) to see Sue again at 10am. & 2pm.     I will be back again with another project soon.

                                                                Love and rainbows,

                                                                 Hugs   Jennifer xx.


Friday 27 April 2018

Reflections.

Good evening Lovelies,

Well Sue certainly excelled herself on the shows on the Hochanda T.V. Channel today.   She is so inspiring and her enthusiasm for her crafting shines out like a beacon lol!   How could anyone, not be inspired to give mixed media  a go lol!!!    Imagination Craft's products are second to none and the samples the design team have made are amazing, such talented ladies.  

Thank you for taking the time to read and comment on yesterday's blog, much appreciated.   Tonight, rather than share one of my journals, I thought I would share one of my cards, made for the shows, which was shown on this morning's programme.  I have used Imagination's Art stamps - 'Reflections,'  Mixed Media Spray inks,  Fashion spray ink and Starlight paints.   Time now for my step by step to making the card below.

              
Cut a rectangle six inches by one and three quarter inches from white card.   Using a black ink pad, stamp the bubbles Art stamp from the set, down the rectangle.   Matt this onto the left-hand side of a white seven inch square base card.

     
Die-cut a hexagon from black card and matt onto the base card, more to the left- hand side of the base card with the point of the hexagon on the rectangle.

Die-cut a slightly smaller hexagon from white card and colour with the Mixed Media Spray Inks.   When dry, add a little watered down White/Gold Starlight paint over the sky and some watered down mint paint over the water.    When dry, stamp the reflections stamp in the centre, using a black ink pad.  Matt this onto the black hexagon.

                
Die-cut a stag from black card, using the Memory Box die and glue to the bottom of the base card,  with his head and antlers  just inside the smaller hexagon.


Die-cut the tree (again a Memory Box die) from black card and glue to the right-hand side of the card.

       
Lastly, glue three silver glitter  buttons to the base of the tree to ground it, so the tree is not floating on fresh air lol!

          
That is this card finished, quite a quick card to make but quite effective I feel, what do you think!   Thanks for stopping by my blog, I do hope you have enjoyed your visit and please don't forget to tune in tomorrow to the Hochanda T.V. Channel to see more demonstrations and beautiful samples from the design team.   Will catch you all again soon.

                                                             Love and rainbows,
                           
                                                             Hugs   Jennifer xx.


Thursday 26 April 2018

A 'Sneaky Peek' at My Riviera Girl Canvas. Made for the Imagination Craft's T.V. Shows.

Hello again My Lovely Followers, Friends and Visitors,

Thank you for visiting my last blog and leaving comments, I do appreciate each and every one.   Tonight I would like to share another of my projects made for Sue of Imagination Crafts.   Their shows begin tomorrow 27th. April at 10am. and 2pm. on the Hochanda T.V. Channel, hope you can tune in to see Sue doing some fabulous demonstrations, or set your recorders so you can watch them at your leisure lol.

I decided to show you one of my canvases tonight,  made for the shows.   I adore this stencil design, she is just so elegant.   This stencil is called  'Riviera Girl.'

     
(1 )   Spray the canvas with the Light Blue Mixed Media Spray Ink.

(2 )   When dry, lay the A4 stencil onto the canvas,  portrait style   Using the metal spatula, spread the White texture paste through the design on the stencil.   Remove the stencil and leave the image to dry.
         
(3 )   Replace the stencil back in position and using a stencil brush, dab the Sky Blue Starlight Paint
 through the design, on top of the texture paste.   Remove the stencil and leave to dry.


(4 )   Add some water using a fine spray, onto her face and dab with some kitchen paper to remove some of the blue ink.   Paint some relief paint over the background, this dries clear, leaving only the shimmering silver sparkle showing.
       
 
(5 )   Take the Lace Magi-Cutz and cut four corners all the same from it, then paint  with the White Gold Starlight Paint.   Glue one in each corner.


.
(6 )     Glue the Topaz stones around the edges of the canvas, in between the gold lace  corners.   Add one as an earring and three as a necklace around her neck.


(7 )   Die-cut five flowers from white card and paint with the White Gold Starlight Paint..   Glue four to the top left of the canvas.

       
(8)   Glue one flower in the bottom left corner.

       
(9 )   Glue a topaz gem to the centre of each flower.

Well that's all from me for the moment.   Hope you like my canvas.   Tomorrow I will share one of my canvas journals with you.   Hope you can pop back tomorrow.   If you do manage to watch the shows tomorrow, I do hope you enjoy them.   Take care of yourselves, see you soon.

                                                                Love and rainbows,

                                                                 Hugs   Jennifer xx.


Wednesday 25 April 2018

Happy Birthday, Roses All the Way. - A Sneaky Peek at a card for Imagination Craft's T.V. Shows this weekend.

Good Evening Lovelies,

Hope everyone is well and happy,  if not I'm sending you a Big  (((Hug))).   Thank you all for visiting my blog and leaving a comment for me, I do love to hear your thoughts on my projects.
 
Well we don't have long to wait until our lovely Sue from Imagination Crafts is back on the Hochanda T.V. Channel.   I know lots of crafters out there have been eagerly awaiting this moment.   It hasn't been that long since Sue was on the T.V. but I have to say, it does seem like forever lol !
The dates and times are as follows:-  Friday 27th April 2018 at 10.00am. and 2pm.     Saturday 28th. April at 8am. 10.00am. and 2pm.     Sunday 29th. April at 10.00am. and 2pm. and I know she has
lots of demonstrations ready for us all.   I do hope you can tune in or set your recorders lol.

Well,  now onto my 'sneaky peek' at one of my cards made for the show, hope you like it as much as I did making it.   Tomorrow I will be sharing one of my canvases or maybe one of my canvas journals.

   
Lay the  script stencil across a 7" x 7" white base card and using a stencil brush, dab the black Starlight paint through the stencil, moving the stencil down the card, until the front of the card is covered with script.

Matt a square of black card onto the base card, leaving a half inch border showing.   Take a smaller square of white card and using the Mixed Media Spray inks - light green, yellow and light blue, spray the card.

  
Lay the Mandala stencil onto the coloured card and spread the white Texture Paste through the design using the metal spatula.   Remove the stencil and leave the image to dry.

      
Add a spray of the pink Fashion Spray onto the card, then matt this onto the black matt on the base card.

Spread some Fabric Relief Paste, Silver Glitter, over some maroon coloured card and when dry, die-cut four roses, roll up the rose die-cuts and glue.   Glue one to the circle on the  Mandala and three around the top edge.

     
Take two flourishes from the Magi-Cutz  Butterflies set and paint with the Cafe Creme Rusty Patina.   When dry, paint with  the  black Starlight paint.   Glue these around the bottom left corner of the Mandala design.

   
Die-cut an oval using the JustRite die from white card.   Stamp 'Happy Birthday'  in the centre and add small black lines around the edge, using a black pen and glue this to the top right corner.


That is this card finished,  thanks for visiting and I will be back again tomorrow with another project to share with you all.    Hope you can pop back.     Take care of yourselves.

                                                                 Love and rainbows,

                                                                  Hugs   Jennifer xx.


Friday 13 April 2018

Autumn Leaves.

Good afternoon Followers, Friends and Visitors,

I do hope you are having a good day, despite this dull dreary weather.   Fear not as the sun is due back tomorrow the weather forecasters  say, let's hope so lol!    Thank you all for commenting and taking the time to visit my last blog post.   I am very busy making samples for Sue & Harvey of Imagination Crafts next shows on the Hochanda T.V. Channel  which are  very soon!   as I cannot show you any 'sneaky peeks' yet, I thought I would share a card I made in October 2015.   For this card I  used Starlight paints in a slightly different way.   Hope you like it.

   
Working on a 7" x 7"  ivory base card, matt a smaller square of black card onto it.   Take a smaller square of orange card and using the Kars stamps, stamp the hedgehog and toadstool in the bottom left corner.   Matt this onto the base card.

   
Apologies for the shadow in the corner of this photo.      Die-cut two corners from black card, using the Tattered Lace die and glue one in the top left and the other in the bottom right corners.  

Stamp the hedgehog and toadstool once again onto a piece of orange card in black ink and 3D them onto the original stamped images on the base card.  

Cut a rectangle from black card approximately one & a half inches x  four & three quarter inches and glue to the right hand side.   Die-cut the panel using the Memory Box die from white card and colour it with the Starlight paints.   Glue this to the black rectangle.

   
Die-cut the tree using the Memory Box die, from white card and colour with the antique gold Starlight paint and shade down one edge with a black ink pad.   Glue this to the card.   Die-cut one large leaf and one smaller leaf using black card and the Marianne Design dies.


Spread some Starlight paints, Menthol, dark orchid, antique gold & orange oxidated onto a work sheet and leave to dry, then scrape up using a metal spatula.   Cover the large and small leaves with gilding glue and put the dried up pieces of Starlight paint onto the glue.   Press into the glue and brush away the excess.

   
Stamp two more small leaves from the Imagination Craft's decoupage set, using the antique gold Starlight paint onto some orange card.   Fussy cut the leaves.   Glue these leaves to the die-cut panel using silicone glue to add dimension to the card.  

     
Cut out a circle for the moon and colour with the Starlight paints.   Glue this to the right of the tree.

   
Well that is all from me for the moment.   Enjoy the rest of your day and I hope the sun shines for you tomorrow.   Take good care of yourselves until my next blog post.

                                                                 Love & rainbows,

                                                                Hugs   Jennifer xx.


Wednesday 4 April 2018

Verona Tile Card.

Good evening All,

Hope you all enjoyed your Easter weekend, despite the dreadful weather.   Thank you so much for your visits and comments on my last blog post, really appreciate them.

Tonight's card was made for Imagination Craft's shows on T.V. back in May 2014.

  
Make a base card from green card stock.   Matt a slightly smaller piece of brown card onto the green, leaving a narrow border of the green showing.

Next take the patterned card and lay the stencil onto it.   Spread the Sparkle Mediums over the design on the stencil, using a metal spatula, doing one part first,    ie; the borders only.   Let this dry.

   
When the image is dry, re-position the stencil, matching it up with what has already been done.   Mask off all but the centre panel using masking tape,    then spread the Chartreusse Sparkle Medium over the centre panel     Remove the stencil and leave the image to dry.

Take a piece of white card and using the small stencil which matches the main stencil image, lay on the card.   Spread the Antique Bronze Sparkle Medium over the design.   Remove the stencil and leave image to dry.

 
When dry,  fussy cut all the pieces and 3D onto the larger image, using silicone glue.   Do two more of the circles and cut them in half and 3D them around the main centre circle.   Colour a piece of white card with the Chartreusse Sparkle Medium and when dry, cut out four triangles and glue one in each corner.

This large stencil is on Imagination Craft's website and has been reduced to an amazing 80p  !!!   I sometimes use the outer border only on some of my cards.

Well that's all for now my friends,    I'll be back soon, thanks for stopping by my blog.   Take care of yourselves.

                                                                   Love and rainbows,

                                                                    Hugs    Jennifer xx.