Followers

Monday 29 May 2017

Starlight Meadow Flower.

Good evening All,

Hope you are all enjoying your holiday weekend, despite the dull dreary weather today.   I watched all of the Imagination Craft's shows on Hochanda T.V. this weekend but unfortunately we lost the  T.V. signal, so I could not watch the lunchtime show - most frustrating!    Brilliant shows and Mandy did so well on her  first shows as a guest presenter for Imagination Crafts.   Congratulations  if  you managed to purchase   any of the products, wow! they sold out so....quickly, not really surprised I have to say!   such fabulous, innovative products.      Well onto tonight's card which was shown on  the shows.   I have used the very pretty Meadow Flower stencil and Starlight paints.    I have also used the Tim Holtz corner die, which I love and I find it a very useful die.    This is a very quick and easy card to make.
     
     
I used a 7"x7" white base card and I began by matting a smaller piece of maroon card onto the base card.   Next I matted a piece of blue card, slightly smaller than the maroon, onto the maroon matt.

  
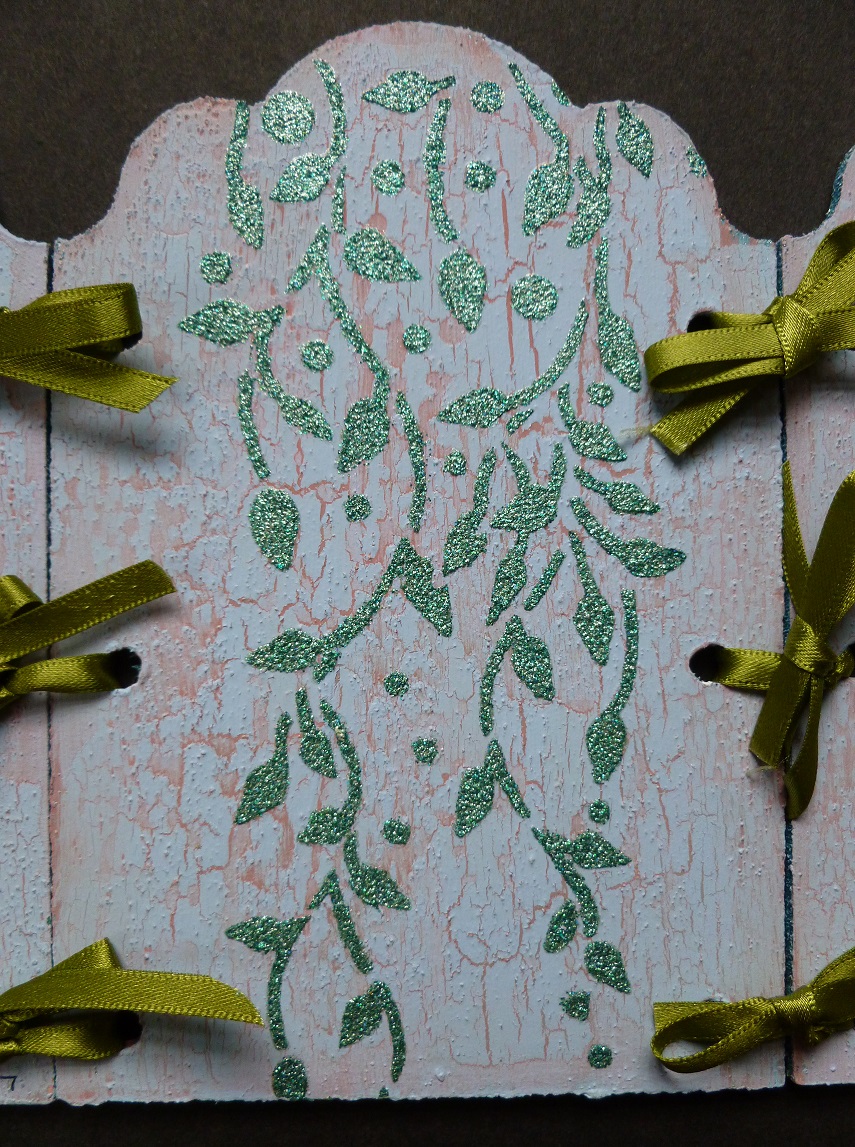
Next, cut a slightly smaller piece of white card and lay the meadow flower stencil onto the left-hand side of the card.   Using a stencil brush, stipple the lilac blue and the bright maroon Starlight paints through the flower, leaves and stem.   Remove the stencil.

   
Cut  a triangular shape from the right-hand side of this card.

    
Take the Tim Holtz corner die and cut out the  'crazy paving' corner from blue card and glue it to the back of the white card, where the triangular cut out is.

Matt this onto the maroon matt on the base card.

   
Glue three blue pearls to the top right of the triangular shape and three to the bottom right corner.

   
Lastly, glue a blue ribbon bow to the point of the triangular shape.

    
Well, there we have it, one finished card.   I have to say, I was quietly pleased with the end results, hope you like it too.     Enjoy the rest of your week.   I will be back soon, until then, be happy and keep smiling.

                                                               Love and rainbows,

                                                                Hugs    Jennifer xx.


Saturday 27 May 2017

Tweet, Tweet, oh so Sweet. MDF Tryptch.

Hello Friends, Followers and Visitors,

Not such a good day today, although very warm and humid.   We had one quick shower of rain but unfortunately not  enough for the garden.   This was accompanied by thunder and lightening.   The sun came out this evening, sounds like tomorrow will be quite good, more jobs to do in the garden.

Hope you managed to watch Sue from Imagination Crafts this evening at 8pm.   Wow! practically all the products sold out and there are four  more shows to go tomorrow!!!   hope Harvey can magic up more products  for tomorrow's shows.   Tonight I would like to share another sneaky peek at my MDF Tryptch made for the show.   I have used one of the really sweet designs of rice paper which are on the show.

   
All three panels are painted with white MDF paint.

Cut out the three bird pictures from the rice paper sheet and feather the edges, then using decoupage
glue, place one on each panel.


When dry, paint the Baltic blue MDF paint around the edges of each panel.


Next add some dark orchid  Starlight wax around the edges, followed by some gilding glue and the 'Frosty Morning' gilding flakes.   Brush away the excess flakes and return to the pot to be used again.   Repeat this for all three panels.

Lay the Toledo stencil on the top right and bottom left corners of all three panels and using the metal spatula, spread  the Blanc Rusty Patina through the part of the design on the stencil you wish to use.   Remove the stencil and leave the images to dry.

   
Now for the back of the panels.   Paint the backs with a coat of the clover MDF paint, then crackle  medium and then the Baltic Blue MDF paints and leave to dry.   The top layer of paint will begin to crack, enabling the clover paint to show through the Baltic Blue.

   
Lay the Falling Leaves panel stencil on top of the dry paint, then spread the Vineyard Sparkle Medium through the design, do this on the back of all three panels then remove the stencil and leave the images to dry.

   
When they are all dry, fasten them all together, by threading some narrow,  green satin  ribbon through the ready made holes in each panel and tying them in bows.

Well that's this project finished.   Imagination Craft's have lots of beautifully designed rice papers and any one of them would look brilliant on this Tryptch.

Please don't forget to tune in tomorrow to see Sue  and Mandy decorating  these beautiful Tryptches.   The times are 9am.  12pm.  4pm.  and 7pm.   that is, if there are any products left to sell lol!!

Have a fabulous weekend and I will be back soon.

                                                                 Love and rainbows,

                                                             Crafty Hugs    Jennifer xx.


Friday 26 May 2017

Thank You for Just Being You.

Hello dear Friends, Followers & Visitors,

Wow! hasn't the weather been glorious,  lawns are all cut now before the rain arrives.   I think once it starts to rain, it may forget to stop lol!    The gardens are desperate  for some water.   Hope you are all looking forward to your Holiday weekend, I know I am, not doing anything special but it will be nice just to relax and chill out.   I will of course be watching our lovely Sue & Lisa on Hochanda T.V.   I can now tell you the dates and times of the shows if you would like to watch.   Sue will be  opening the show on Saturday night  27th. May at 8pm.   The shows will continue on Sunday 28th. May  at 9am.   12pm.   4pm.   & 7pm.   I do hope you can tune in.   Tonight I am sharing another card with you which has been made for the show.     I have used Imagination Craft's beautiful Wisteria  panel stencil and Starlight paints.

   
Lay the wisteria stencil onto a rectangle of black card and using a stencil brush, stipple the Starlight paints through the design.


 Take an inch strip of black card, the same length as the rectangle,  (which will fit down the left-hand side of the 7"x7" ivory base card).   Using the Martha Stewart punch, punch down one long side only.   Fix the black rectangle and the punched black card down the left-hand side of the base card, leaving a narrow border down the fold of the ivory base card.

  
Glue three pink  gemstones near the bottom of the card fold.

  
Using a black ink pad, stamp 'To my friend' on the top right and 'Thank you' sentiment near the bottom.


Colour some white card with the Starlight paints, then stamp out  two butterflies, using a black ink pad.

  
Cut them out and glue them in between the two sentiments.   Add a little silicone glue under each wing to give some dimension to the design.

   
Take a spare piece of black card and lay the wisteria stencil on it and colour one stem of the wisteria as previously and trim around it, then glue on top of the original image, using silicone glue.

 
Well that's all for tonight my Friends.   Enjoy your weekend and I will be back with another 'Sneaky Peek' soon, this time it will be an MDF project.   Below is a 'sneaky Peek' to hopefully, wet your appetites.   Catch you all soon.


                                                              Love and Rainbows,

                                                           Crafty Hugs   Jennifer xx.


Thursday 25 May 2017

Art Deco Flowers.

Good evening Followers, Friends and Visitors,

Hope you are all enjoying this fabulous weather we are having at the moment.   It is just a little too hot for me but so lovely to see the sunshine.   The garden having been behind, has suddenly burst into leaf and blossom,  not to mention all the weeds lol!  

Sorry for not posting any blogs for a few days but I have been very  busy making samples for Imagination Craft's next two shows, one of which will be this holiday weekend.   I'm not sure where the time has gone!    Here as promised is one of my samples, made for this weekend's shows.   When I received my 'happy post' I was so excited to see some gorgeous Art Deco stencils in the box.   As you probably know by now,  anything Art Deco is right up my street, so here is my first card.   These stencils are just stunning and teamed with Sparkle Mediums or  Starlight paints are just amazing.   Hope you like this one,  as the stencil is just so elegant, I felt nothing else was necessary, as I did not want to detract from the beautiful image.

    
Matt a square of pink card onto the white 7" x 7" base card, leaving a border of the white base card showing.

   
Cut a smaller piece of black card and lay the Art Deco flower  stencil onto it.   Spread the crushed strawberry Sparkle Medium over the flowers and the vineyard over the stems and leaves, using the metal spatula.   Remove the stencil and leave the image to dry.

Matt this onto the pink matt.

    
Die-cut the oval and the vines from pink card using the Just Rite dies and stamp the greeting onto the stitched oval die-cut, using a black ink pad. 

   
Glue the oval and the vines to the bottom right corner, using Magi-Bond glue.   Add two teal coloured gems to the oval.

Well that is this card finished, a very quick and easy card to make, that looks very elegant, a very simple but elegant design.   Thanks so much for stopping by my blog, hope you have enjoyed your visit.   I will be back soon with another card to share with you.   Enjoy what is left of this beautiful weather as I think rain is forecast for the weekend.

                                                              
                                                                  Love and rainbows,

                                                                    Hugs Jennifer xx.


Friday 19 May 2017

'Time to Dream.'


Hello there Friends, Followers and Visitors,

Hope you have all had a good week, I know some of you have had wet weather, we on the other hand
have had dry sunny weather, except for today, when we have a couple of showers.   The gardens really needed a freshen up.   Tonight I would like to share another card with you all, which was shown on Imagination Craft's show on the Hochanda T.V. Channel recently and features a stamp set . for Imagination Craft's, designed by Lisa B.     I just love these sets.

  
Matt a square of black shiny card onto the 7"x7" white base card, leaving a border of the white card showing,  gluing two die-cut cogs under the black card, also cut from black card,    Matt a smaller square of  silver mirri card onto the black.


Take a smaller piece of white card and mask off a circle the size of the pocket watch, I use a  'post it' sticker.   Whilst this is in place, colour the white card with the distress inks, leaving it slightly darker around the outside edges.   Remove the mask.

   
Lay the diamond Art stencil onto the left-hand side of this coloured card, making sure the diamonds are masked off where the white circle is.   Spread the silver rose Sparkle Medium over the diamond design, using the metal spatula.   Remove the stencil and leave the image to dry.

  
Using the black ink pad, stamp the main image over the white circle, which was created by the mask.  (This ensures the watch face is white and not green like the rest of the background.)

      
Stamp 'live'  'love'  'laugh' and 'dream' between the diamonds, again using a black ink pad.

  
Stamp the group of butterflies in the bottom right corner.   Matt this onto the silver mirri matt.   Die-cut another large cog and two small ones and glue to the card front.   Use silicone glue under one large and one small cog, to add some dimension to the card.

  
Stamp the corner stamp from the set, using a black ink pad, in each corner of the white base card.

 
Well that's my card finished.   Thank you for stopping by my blog and I hope you all have a great weekend.   I am preparing samples at the moment for Imagination's next show  on Hochanda T.V.  at the end of this  month.    I will let you know the exact date and times nearer the time.   I am also preparing samples for the show after that too!   so  it is all go here lol.     I am loving working with all the products for both shows, particularly the show at the end of this month, as the theme is one of my favourites, sorry cannot say what that theme is yet but I will be sharing some 'sneaky peeks' next week, so please keep popping back.   See you all soon.

                                                                  Love and rainbows,

                                                                   Hugs   Jennifer xx.


Monday 15 May 2017

Pretty in Pink.

Hi there Followers, Friends and Visitors,

Sorry I haven't posted recently. just not sure where the time has gone !!     Hope you are all well, if not, I do hope you feel well soon.   I have been busy again in my craft room, making samples for Sue & Harvey of Imagination Crafts, next One Day Special shows on the Hochanda T.V. Channel near the end of this month.    I will of course be sharing some 'sneaky peeks' of my projects a little nearer the time.   I have to say I am really enjoying working with these gorgeous stencils, right up my street lol!


On to tonight's card which was made for Imagination's ODS show  April 2017.   For this card I have used one of  their beautiful rice papers, which are so easy to use,  and   makes a very quick and   easy card.

   
Lay the script stencil onto a square of pink card and spread the Cinnamon Sparkle Medium over the design, using a metal spatula.   Remove the stencil and leave the image to dry.


Cut out the flower image from the sheet of rice paper (no, 198) and using the decoupage glue, fix this to a piece of pink card.   This helps the image blend with the background card by shinning through the rice paper.   Do not worry if you get decoupage glue on the front of the rice paper, as it will not be noticed when dry.


When dry, matt this onto a slightly larger piece of black card, then fix to the script background.   Matt this onto  a slightly larger square of black card, then fix to the 7"x7" white base card.   Glue three aqua pearls to the top left of the base card.

   
Lastly, glue an aqua ribbon bow to the bottom right of the main image.   Well, there we have it, card finished.   Hope you like it.   Thank you for stopping by my blog, I hope you have enjoyed your visit.   I will be back again quite soon, so until then, take care of yourselves and above all, be happy.

                                                                 Love and rainbows,

                                                           Crafty Hugs   Jennifer xx.


Wednesday 10 May 2017

Lucky Black Cat

Hello  Followers, Friends and Visitors,

Another beautiful day here again, warm and sunny.   Managed to get two lawns cut today and spent the afternoon in my craft room working on some new samples for Imagination Craft's next shows on the Hochanda T.V. Channel, later this month.   Tonight I felt it was time to share another of my tags made for Imagination Crafts.   This one is for all my lovely friends who love their little fur balls,   I myself do not have a cat but I know lots of you do.   Hope you like it.   The tag and background look blue but they are in fact white, not sure why this is,   I'm not the best photographer lol!!

    
Cut a large tag from white card and trim with a trimmer, using a scalloped blade.   Colour the edges with a black ink pad.   Put this to one side for the moment.

Cut out a smaller tag shape from white card  but this time, with a straight cut edges.   Lay the 'arch of flowers' stencil on the smaller tag and spread some silver Sparkle Medium over the design, using the metal spatula.      Remove the stencil and leave the image to dry.

    
Lay one of the 'three cats' stencil onto a spare piece of white card and rub some black ink through the design, using a piece of cut 'n' dry foam.   When the ink is dry, trim around the cat, leaving a tiny border of white around the image.  

Draw a plank of wood onto a piece of white card, using a black pen.   Cut out and glue onto the smaller tag, at an angle, on the right-hand side.   Fix the cat  on the plank using sticky foam pads.

   
Stamp the sentiment in the bottom left corner, using a black ink pad.   Fix the smaller tag to the larger  tag.

 Punch a hole in the top, then thread some red satin ribbon through the hole.


Glue a small piece of narrow red velvet cord to the cat's neck, then glue a red lace flower to the right of the cat's collar.  


Lastly, glue a silver glitter button to the bottom left corner  and make a stand so it can be stood up if wished.


Well that's all folks, enjoy the next few days and I will be back soon with another project.

                                                               Love and rainbows,

                                                                Hugs   Jennifer xx.


Sunday 7 May 2017

My Butterfly Canvas Journal.

Good evening Followers, Friends and Vsitors,

Hope you have all enjoyed your weekend and are well, if not I do hope you will feel better very soon.   We have had another lovely day here again but this evening feels quite chilly.   I don't mind colder evenings when the days are lovely.    I received some 'happy post' from Imagination Crafts on Friday, products for their next shows on the Hochanda T.V. Channel near the end of this month.   Wow! the new stencils are just stunning, I love them, I  cannot tell you too much at the moment but they are right up my street!   Those of you who know me, know that I have two favourite subjects I love to work with and these  are one of them.   I couldn't wait to get started lol!   I am really enjoying working with these stencils but enough teasing lol, back to tonight's project, my butterfly journal.   This was made for Imagination's  shows on Hochanda on the 1st. May 2017.


Remove the front and back pages of the journal.   Lay the large butterfly stencil onto the front page and spread the stencil medium over the design, using the metal spatula.   Remove the stencil and leave the image to dry.


Paint a thin layer of white gesso over the whole front page.   When dry, replace the stencil in the correct position and dab some Versamark through the design using a piece of cut 'n' dry foam (on top
of the stencil medium and gesso).   Remove the stencil and heat emboss with white embossing powder, using a heat gun.   (This embossing will resist the spray inks, we will be using next, so the ink will be able to be rubbed off the embossing easily).


Spray the page with the red, sunshine and light purple mixed media spray inks and leave to dry, wiping off the inks from the embossing, using a piece of kitchen roll.


Lay the script stencil on the top left of the front page and spread the cinnamon Sparkle Medium over the design, in between the feelers and wings of the butterfly,, using the metal spatula.   Remove the stencil and leave the image to dry.

 
Place the diamond stencil on the bottom right and spread the golden bronze Sparkle Medium over the design.   Remove the stencil and leave the image to dry.

 
Add dots of the Peridot Gold Starlight paint to the minute dots and in the centres of the cogs, on the pocket watch.   Paint the heart on the bottom left with the red spray ink.


                                              Now on to the back page of my journal


Repeat the same technique onto the back page of the journal but instead of the butterfly stencil, use the large pocket watch stencil and instead of the golden bronze, use the cinnamon Sparkle Medium  with the script and the diamond stencils.   Leave images to dry.


Fix the front and back pages back onto the spine.   That's it finished.   Just a couple of tips - (1)  make sure you have your watch stencil the correct way round, ie;   the numbers are facing the correct way and tip (2) also make sure you have your pocket watch stencil  the correct way up  and not as I did lol! the wrong way up!!  the spine holes on the left like I did for the front page, of course the holes should be on the right, so when you fix the back on the book, the image will be the right way up!!   Hope that all makes sense, I'm confusing myself now  ha ha..    I very quickly realised  what I had done and  was able to scrape off the Stencil Medium and covered the back with a coat of gesso and began all over again! and fortunately it worked lol no one would ever know, (well you do now lol!!)

I would also colour the backgrounds of the front and back of the journal,  at the same time so the colours on both are the same intensity.     I did them separately and the colours were stronger on the back than the front.   Ah well !  we all learn by our mistakes!   and I'm not immune lol!    Thanks for stopping by my blog.   See you again very soon.   Have a good week.

                                                                 Love and rainbows,

                                                             Crafty Hugs,   Jennifer xx.