Followers

Friday 29 July 2016

Say It With Flowers.

Good evening Followers, Friends and Visitors,

Hope everyone has had a good week and are ready for a relaxing weekend.   My card tonight was made for Imagination Craft's  shows on the Hochanda T.V. Channel on 20th June 2016.


I used a white 7"x7" card as a base card.   I took  a square of black shiny card  and I laid the 'Thank You' stencil onto it.   I then spread some gold shine Sparkle Medium over the words, using a metal spatula.   I removed the stencil and left the image to dry.


 When dry,  I matted  this onto the white base card.   Die-cut  two black corners, using the Tattered Lace corner  die and glued one to the top left corner and the other to the bottom right corner, using Magi-bond glue.


I die-cut some flowers and leaf stems using the Memory Box Dies and coloured  these with the Starlight paints, then glued the  flowers to the bottom left corner.


I then glued some of the flowers to the top right corner.   Well that's all from me tonight my Friends, I will be back in a day or so.   In the meanwhile, enjoy your weekend and thank you so much for stopping by my blog.

                                                               Love and rainbows,

                                                                 Hugs   Jennifer xx.


Tuesday 26 July 2016

Pimpernel Petals Card.

Good evening Followers, Friends and Visitors,

Hope your week is turning out the way you hoped it would..   The card I have for you tonight was made using an Imagination Craft's stamp set, designed for them by Lisa B. Designs, a really pretty set, which can be purchased from the  Imagination Craft's web site.

Fold the cream card down the centre crease line, making a 7"x7" base card on which to work.Take a smaller square of deep jade  card and put into the  Tattered Lace embossing folder and then run through an embossing machine, matt this onto the base card. 


Cut two pieces of terracotta card (both the same size) and stamp 'Thinking of you'  in the top left corner of
one and 'With Love' in the bottom right of the other using a Versamark pad and heat emboss with gold embossing powder.  Glue these terracotta squares to the top left and bottom right corners of the jade card.


Die-cut a large scalloped  oval from cream card, using the Spellbiuder's die set,   stamp the large stamp from the Pimpernel stamp set onto it, using the multi-coloured, Autumnal colour pigment  ink pad, then heat emboss with clear embossing powder.  

    
Glue the oval, on an angle to the centre of the base card.    Colour the image with well watered  down Starlight paints, to match the colours on the embossed image.


Glue an orange ribbon bow to the top right corner of the jade card.    That's this card finished.   I will be back again soon.   Thanks for stopping by my blog, hope you enjoyed your visit.   Enjoy the rest of your week.

                                                                    Love and rainbows, 

                                                                      Hugs   Jennifer xx.


Sunday 24 July 2016

In the Red Card.

Good evening All,

We will  be in to August before we know it!  this year seems to be going by so fast lol!   Hope you have all had a good weekend.   The weather here has been warm with some sun and a few light showers, mustn't complain, at least the thunder and lightening has gone lol!

My card tonight features one of Imagination Craft's new Art stamps.   This one is called Corn Heads, so this being a negative stamp (ie., the background only  is stamped, which leaves the design on whatever coloured card you have chosen to use, in this case the poppies and corn heads on white card).   As I was stamping the background in black, onto white card, I thought I would use red as the main contrast  colour.

    
Fold the ready creased white card in half, making a 7"x7" base card.   Cut a piece of black card and using the EK Success corner punch, punch all four corners.   Put this to one side for the moment.   Next, cut a piece of white card so it will fit into the punched corners, (approximately a quarter of an inch smaller than the black card).   Paint this with the red Starlight paint, then add a few brushstrokes of the white Gesso on top of the red.   When dry, fit this into the punched corners and then fix to the base card.

      
Using some white card, stamp out the main poppies and corn image using a black inkpad.   Trim around the image, leaving a tiny white border showing around the outer edge of the image.   Matt this onto a slightly larger piece of black card, then matt this onto the centre of the base card.

      
Colour some white card with the red Starlight paint and punch out the flower three times using the Woodware flower punch.   Glue one on top of the other using silicone glue.   Add a ring of green stickles glitter to the flower centre and add some tiny black seed beads to the glitter.   Glue the flower to the bottom right of the image and add three die-cut leaves, cut from light green card.

       
Glue a small piece of black lace to the top left corner of the card and glue a red  satin ribbon bow on top.  

     
Glue three tiny black ring sequins to the bottom right.    That is this card finished, I will be back again soon with another creation.   In the meantime, have a good start to the new week, and thanks ever so much for visiting my blog,   see you all soon.


                                                                    Love and rainbows,

                                                                       Hugs   Jennifer xx.


Friday 22 July 2016

Magic Moment Card.

Hello there it's me back again with another card.   This card features a gorgeous little stamp which I received free with a craft magazine some time ago.   I have used Imagination Craft's fabulous Starlight paints to colour it.      I do like making cards with cute images every now and again and this is certainly a 'cute' image lol!

  
Fold the ready creased white scalloped card down the centre crease line, making a 6"x6" base card.   Die-cut four corners using the Marianne Design corner die and paint with the Imagination Craft's Antique Gold Starlight paint.   Glue one in each corner of the base card, leaving approximately half an inch border of white showing.

   
Using a black fine liner pen,  hand draw some lines with a squiggle now and then around the edges of the card.

 
Die-cut a large dark green oval and glue to the centre of the card.   Die-cut a smaller oval from pearlised card and colour the sky with well watered down Starlight paint and well watered down menthol for the grass.

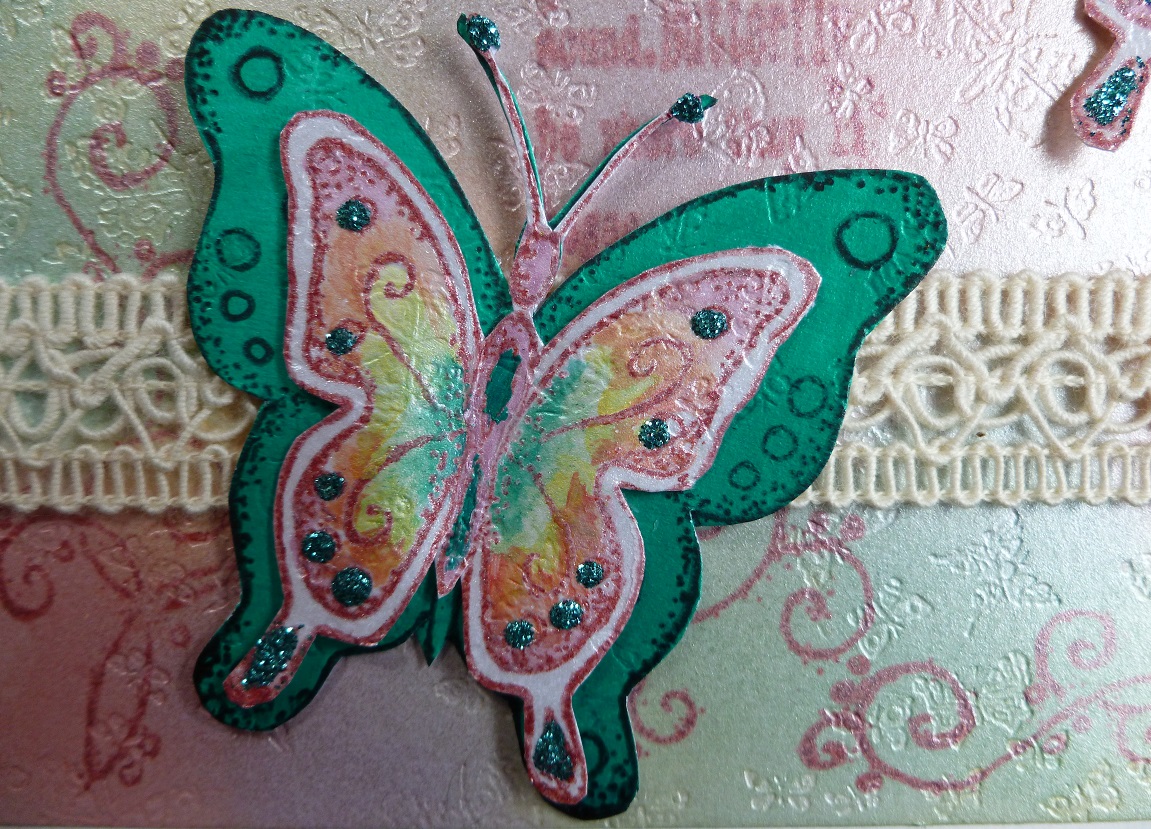
Next stamp the mice and toadstool image onto it, using a Versa mark pad and heat emboss with black embossing powder.

  
Colour the image with the Starlight paints, again watered down with a little water.   Fix this oval to the green oval, with sticky foam pads.

  
Stamp  the small tag using Versa mark and heat emboss with black embossing powder.   Colour with the Starlight paints, cut out  and glue to the right of the image.

 
Glue a small white ribbon bow to the tag.   Die-cut  2 roses using the rose die (given free with a craft magazine)    Paint them with the Dried Rose Starlight paint.   Form into roses and glue one to each side of the oval.

 
Keep 6 of the small squares, left-over after die-cutting the corners and paint them with the dried rose paint.   Glue three to the top left and three to the bottom right of the smaller oval.

I love this stamp, really cute, sorry cannot remember which magazine it came free with.  Hope you like it.   Have a fabulous weekend everyone and I'll be back soon with another card to share with you.   Happy crafting.

                                                                     Love and rainbows,
                                                                    Big Hugs   Jennifer xx.
 
Saturday 23rd. July 2016.                              

P.S.   Hi Folks, I have just found the stamp set and the name of it was Moonbeam Meadow by Crafter's Companion, which was given free with the 'Quick Cards Made Easy' Craft magazine.   Here is a photo of the stamp set.


                                                         Bye for no,  Love & Rainbows,
                
                                                                       Hugs   Jennifer xx.


Thursday 21 July 2016

Butterfly Trio.

Hi there Lovelies,

Thought I would slip in another post tonight.   This card was made in August 2014 for Sue and Harvey of Imagination Craft's.   The stamp set I used is, I think still available on Imagination's website at an amazing bargain price, (if it hasn't sold out lol!!)    This stamp set, amongst others was featured on Imagination's latest show on the Hochanda T.V. Channel on the 19th July.   Below is one way you could use this set.

    
Make a base card from green card.   Onto this matt a piece of white card, slightly smaller than the green.   Take a piece of white  pearlised butterfly card and colour with the Apple Lace, Purple Lace, Sunshine Satin, Emerald Gold & Sunset Satin Silkies, which are also available from their website.

   
When dry, take the scroll stamp from the set and stamp around all four edges of the card, using a red distress ink pad.   Next stamp the text onto the card, again using the red ink pad, placing it just  a little off centre.    Wrap a piece of cream braid around the base  of the card, approximately  one inch up from the bottom and secure on the reverse.   Matt this onto the base card.

       
Take a spare piece of the pearlised card and stamp  one large and three small butterflies from the set, using the red ink pad.   Colour with the Silies to match the background.  

    
Glue two small butterflies onto the base card and glue one small one onto the large butterfly, putting some silicone glue under their wings  to lift them up a little.    Glue the large butterfly on top of the braid on the left hand side.

   
Last but not least, put some small drops of  the Jade Detail Sparkle on the butterflies wings and antenna.  Well that's it finished my friends, hope you like it.   Many thanks for visiting my blog, I do hope you found some inspiration for your card making.   I'll be back again quite soon.

                                                                   Love and rainbows,

                                                                 Crafty Hugs   Jennifer xx.


Wednesday 20 July 2016

A Victorian Christmas.

Good evening Folks,

Hope the weather hasn't been too bad for you,  it  began a beautiful sunny day this morning, then it turned very dark, then thunder and lightening, along with very heavy rain.   Living in the hills, the thunder echoes around the hills, making it sound much louder than it is lol!     Thankfully it is now dry but how long for I ask myself  lol!     My card tonight was made for Imagination Craft's  shows on the Hochanda T.V. Channel on the  5th. July 2016.   I used one of their beautiful Christmas rice papers for this card.   This is a very quick and easy card to make if you do not have much time.

    
I used a 7"x7" ivory base card and onto this I matted a smaller square of dark green card.    I then took a smaller square of white card and coloured it with the scattered straw and festive berries distress inks.  I sprinkled some droplets of water over it and   put a piece of kitchen paper on top to remove the droplets (this also removes some of the ink, leaving a nice background to your card.)   This was then fixed to the base card.  

  
I used the ivy branch panel stencil and put it down the centre of the card, securing with masking tape and dabbed the menthol and emerald green Starlight paints through the design, using a stencil brush.  

   
I cut out three elements from the rice paper and feathered them  by wetting the edges of each element with a paint brush and water, then gently pulling  the paper away where wet, around each image.

   
When the images were dry, I glued them to the card front, using Imagination's decoupage glue.  

   
Last of all, I added a small red ribbon bow to the  top of the ivy branch. 


Well that's all tonight,  see you all again soon with another creation.   Thank you so much for your visits and comments on my blog, I do love to hear what you think of my creations.   Take care of yourselves until next time.

                                                                 Love and rainbows,

                                                                   Hugs   Jennifer xx.


Monday 18 July 2016

Spring Crocus.

Hi there Followers, Friends and Visitors,

Hope you all had a good weekend.   We spent Sunday with our beautiful grandson, as he did his very first charity bike ride and that is no mean feat lol as we live in the hills !!!   a lot of peddling uphill but equally  a lot of free wheeling downhill lol!!    The weather was really quite hot, so they stopped halfway for a drink and a hot dog! then off again, about 8 miles,   quite  a long ride for little legs!  We're  so proud of him, he can't wait for next year's ride lol!

Well onto tonight's card.   This was made in February 2014 for Imagination Craft's and uses one of their lovely decoupage stamp sets.   The image can be left flat or decoupaged, either way it looks good.

   
Make a base card from white cardstock,    A4 folded in half landscape style.   Matt a slightly smaller piece of black card onto the white, leaving a smaller  border of the white showing.   Next take a smaller piece of buff coloured paper and stamp the main image  onto it randomly, using a black ink pad.   Glue this to the base card.

Next take a piece of black card and die-cut the patterned square, using the Spellbinder's die.   Put this square to one side for  the moment and trim the outside edges of the  negative, (left-over after cutting out the square) slightly smaller than the buff paper.   Wrap a piece of cream organza ribbon across the centre, then glue this onto the base card.

Now go back to the die-cut square and stamp the main image onto it using a Versamark pad and heat emboss using gold embossing powder.   Fix this onto a piece of white card and then onto a piece of black card, each time, leaving a tiny border of each showing.

    
Stamp the main image a further five times, using Versamark and heat embossing with the gold powder.   Cut out the flowers and leaves.   Colour with the chalks and then 3D the image and glue to the original stamped image, using silicone glue.    Add an organza  ribbon bow to the left edge of the card.

    
Well there we are, another card finished.    Please do not forget to watch the Hochanda T.V. Channel tomorrow (Tuseday 19th July) at 10am. 1pm. and 5pm. to see our lovely Sue and Lisa doing lots of demos.   Hochanda will be doing some great deals on stamps, at unbelievable prices, some real bargins to be had lol! so don't miss these programmes!!!!    I will be back again soon with another of my creations.   Thank you so much for dropping by my blog, I really do appreciate your visits and comments.   Please feel free to leave me a comment and I will endeavour to recipricate, by visiting your blog.   Enjoy the balmy Summer weather, as I don't think it is going to laset, so make hay while the sun shines lol!!     See you soon.


                                                                  Love and rainbows,

                                                                 Big Hugs   Jennifer xx.

Saturday 16 July 2016

Christmas Tree Special.

Hello there,

Hope you're having a good Saturday.   We've had a quiet one here and the weather has been beautiful,  and sunny with a warm breeze.   Tonight I would like to share a card I made for Imagination Craft's One Day Special shows  on the Hochanda T.V. Channel on the 5th. & 6th. July 2017.   I used their beautiful Christmas rice paper for this card, along with some Sparkle Medium and a stencil.   Hope you like it.

     
Cover the front of a 7"x7" ivory coloured base  card with some decoupage glue, then lay the part of the rice paper you wish to have on your card, onto it and smooth it out so there are no creases.    Trim away any excess which overhang  the edges of the card, using a pair of scissors.  

    
Take a piece of green card  and lay the tree stencil onto it and spread the gold shine Sparkle Medium over it, using the metal spatula.   Remove the stencil and leave the image to dry.

   
Stamp the ivy branch and 'Greetings of the Season' onto the green card,  using the Versamark pad.  The ivy to the top right and the sentiment just down a little from the top left and heat emboss with Imagination Craft's metallic gold embossing powder.

   
                              Glue a small red bow to the top left and some small red gems to the tree.

Cut out three images from the rice paper and glue them onto some white card, using the decoupage glue.   When they are dry, cut around each image and using silicone glue,  glue in position on the tree.


Trim around the bottom of the tree , then matt onto a piece of gold mirror card, again trimming around the bottom of the tree.   Glue a spare piece of green card behind the gold, leaving some showing below the bottom of the tree.   Glue this to the centre of the base card - card finished.  

Thanks for stopping by my blog,  hope you have enjoyed your visit.    Have a lovely restful Sunday. and  I'll see you  all again very soon.  
   
                                                               Love and rainbows,   

                                                     Happy crafting, Hugs   Jennifer xx.


Thursday 14 July 2016

Snowflake Crescent Card,

Hi there Followers, Friends and Visitors,

Hope you have all had as nice a day as we have had here.   Blue skies  and the sun was  really quite hot.   The  blackbirds are enjoying themselves in our strawberry bed lol!  so we have put up the fruit nets to protect them!    We had  strawberries and ice cream after dinner tonight and they were yummy!  picked and eaten within half an hour lol!!  can't beat it!    Well,  on to tonight's card,  this was made using Imagination Craft's very pretty 'snowflake crescent' stencil, Starlight paints and Sparkle Medium and was made for their show on the Hochanda T.V. Channel on 5th./6th. July 2016.
  
     
Matt a smaller square of gold mirror card onto the white ready creased 7"x7" base card, leaving a quarter inch border of the white base card showing.


Take a slightly smaller piece  of navy blue card and lay the snowflake crescent stencil onto it.   Using the stencil brushes stipple the Starlight paints through the design.   Remove and clean the stencil

      
Lay the stencil back in position on the design, having first  masked off the area around the largest snowflake, with masking tape.   Spread the Diamond Sparkle Medium over the largest snowflake, using the metal spatula.   Remove and clean the stencil and spatula.

      
When the image is dry, stamp 'Happy Christmas' from the 'Holly' decoupage stamp set. just  inside the top of the crescent, using a Versamark pad and heat emboss with silver embossing powder.   Matt this onto the gold mirror card. 


I will be back soon with another creation, so hope you will be too!   Thank you very much for your interest in my blog.    Have a good Friday.

                                                                Love and Rainbows,

                                                                  Hugs   Jennifer xx.