Followers

Saturday 30 January 2016

That Little Mouse Again lol!

Good afternoon Followers, Friends and Visitors,

Hope you are having a good weekend, whatever you are doing.   Shopping done this morning, back in time for lunch and now having a lazy weekend lol!    It is really windy here today, we woke up to a sprinkling of snow!  and it is bitterly cold Brrr... just cannot seem to get warm today.    Thought I would write up my blog now instead of this evening, as I like to watch The Voice on T.V. on a Saturday.

The card I have for you this afternoon is a little different to my usual, although I have not used an Imagination Craft's stamp, I have used their very pretty Chalkies to colour the image.   These are very pretty coloured chalk paints which give a lovely  matt finish.     

This  stamp is one of my favourites and every now and then,   I just feel the need to use it again, I just love this little mouse he is so cute.  If I remember right, it is a Stampendous stamp, I do have more of these sweet stamps, just cannot resist buying them when I see one lol!

    
Make a base card from white card approx.  five and three quarter inches by seven and a half inches.   Draw a line with the odd squiggle in it, around the edges, using  a black pen.   Don't make this line too perfect !     Matt a piece of lavender card onto the white, leaving a border of the white showing, before the pen  line.  

   
Die-cut a piece of lattice using the Memory Box die, from light green card and matt onto a piece of yellow card.   Fix this down  the left-hand side of the base card.  

    
Die-cut two corners from the yellow card, using the Sweet Dixie die and glue to the top and bottom right-hand corners.

   
Take a piece of white card and stamp the little mouse image onto it, using a black  permanent ink pad, which will not bleed when you colour it with the diluted Chalkies, an ordinary ink pad will.  

  
Colour the image with the Imagination Craft's beautiful Chalkies paints, Citrus fresh, Sugared almond and Stone wash, diluted with a little water.


Die-cut a scalloped oval using the Spellbinder's die,  from this stamped image, placing the image in the centre of the oval.

    
Shade around the edges of the oval with distress ink, I used Iced Spruce and a blending tool.   Matt this on top of the lattice and the corner dies.

   
All that remains to be done, is to add an organza ribbon bow and three lavender gem stones.  Enjoy the rest of your weekend.   Catch you all in a few days.   Stay warm and snug.   Time to put the kettle on for a nice cup of tea lol!      Bye for now.

                                                                 Love and rainbows,

                                                                    Hugs  Jennifer xx.


Thursday 28 January 2016

'A Sneaky Peek' at one of my MDF Boxes for the Hochanda TV Shows.

Hello there everyone,

Well it has been another dull, dreary and wet day here, again.   There was a small piece of blue sky earlier this morning but it did not last longer than ten minutes and it clouded over again!   Hope you  are all looking forward to the weekend.   Please do not forget to tune into the Imagination Craft's shows and Hochanda TV tomorrow.      More great techniques and more special offers!!!!

I'm not sure why I have lost two of my lovely followers, It apparently has something to do with Blogger I'm told.   I appreciate each and everyone of my followers, so disappointing!

Tonight I would like to share another of my projects, which has been made for Imagination Crafts shows on Hochanda TV tomorrow (Friday 29th January 2016.)     This is a decorated MDF box.   Before I begin my step by step guide, I must apologise for the photographs lol!    the light was so poor when I took them, they do look better in real life so to speak, than on these photos lol!

     
(1)   Box painted inside and out with  white MDF paint, then with a coat of Baltic Blue MDF paint.

(2)   Silver, Cobalt & Sherbert Alchemy Waxes rubbed over the outside of the box.

(3)   Stencil  placed on top and sides of the box and Dried Rose Starlight Paint dabbed through the flowers 
        only, using a piece of cut n' dry foam.   Remove stencil and leave image to dry.


(4)   Stencil placed back in position and the Silver Sparkle Medium, spread over the squares on the stencil, using a metal spatula.   Carefully remove stencil and leave to dry.


(5)   Repeat this on all sides of the box, not including the sides of the lid,  leaving each side to dry, before doing the next.


(6)   Hinges and clasp pained with a thin layer of Silver Starlight Paint.   Do not put too much paint on these brass pieces or you will not be able to bend the hinges, or move the clasp.

(7)   Large Art Cutz flower, coloured with the Sherbert and Cobalt Blue Alchemy Waxes.


(8)   Smaller Art Cutz flower coloured with the Silver Alchemy Wax and a small amount of Silver Sparkle          Medium added to the petals   The silver flower glued on top of the larger flower using silicone glue..         A   clear gemstone glued to the flower centre.    This flower glued to the bottom right corner of the box
        top. 

         
(9)   Butterfly circle cut using the Spellbinder's die,  from white card, then  coloured with the waxes, then                glued  to the centre of the inside of the lid.


(10)   Art Cutz butterfly coloured with the Alchemy waxes and glued to the centre of the butterfly circle.

 (11)   Three small silver beads glued to the top left of the box top..

  
Well that's this box finished, I have to say, I have enjoyed making this box.   I wasn't at all sure just what I was going to do with it, so I decided on the colour and the stencil and just began.   It seemed to just develop as I went along lol!   but I'm quietly pleased with the end result.

Thanks for stopping by to have a look.   I would like to think I may have inspired you to have a go at decorating one of these MDF boxes.   Not only are they pretty when finished but are very useful too!!!   not too big and not too small, just right - sounds like the story of the  Three Bears,  the chairs and the porridge  ha! ha!

Please don't forget to tune in tomorrow and if you can't, set your recorder to record.   See you soon.

                                                               Love and rainbows,

                                                      Happy Crafting,    Hugs   Jennifer xx.


A Nightingale Sang......A Sneaky Peek at my MDF Frame for the Hochanda T.V. Show.

Good evening Followers, Friends and Visitors,

As it is getting close to Imagination Craft's next show on Hochanda T.V.   I would like to share one of my projects with you.   For this I used Imagination Craft's MDF Frame set and some beautiful new rice paper,  Starlight paint alongside other products.

    
This kit comes with a front frame, a back piece and the cut out square, should you wish to incorporate this into your design.

Place the stencil onto the front frame and spread the white stencil Medium over the design, using the metal spatula , remove the stencil and leave the image to dry.

Paint over the stencil medium with the cream MDF paint and paint the outside of the back piece.   Run the brayer through some Topaz Starlight paint and run the brayer over the embossed surface of the cream painted stencil medium,  leaving some of the cream paint showing.

  
Paint the centre of the inside of the back with the Topaz Starlight paint and add a couple of strokes of  the cream MDF paint, just to tone the topaz down a little.

       
Tear three pieces of the rice paper, ie: the bird,  the branch and the rose and glue to the stencilled frame, the branch  to the  top right,  the bird  to the  bottom left and the rose to  the bottom right, using PVA glue.

      
To make a hanger, paint a piece of string with the topaz Starlight paint and glue to the inside of the back piece.   Glue the front frame to the back using magi bond glue.

     
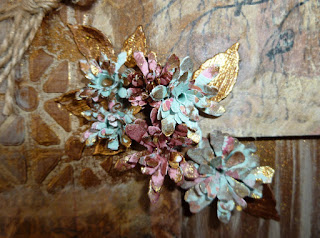
Die cut the flowers from  patterned paper using the Sizzix dies and colour the tips of the petals with the topaz paint.   Glue these to the top left and bottom right of the square aperture.

       
Die cut the leaves using the Sizzix dies and paint with the topaz paint, then glue between the flowers.

    
Finally make a bow out of natural string and glue to the top left of the frame.   Well that's it folks.   Please don't forget to tune in to the Hochanda TV Channel on Friday.   I'll be back again very soon with another sneaky peek and next time it will be an MDF box.    See you all soon.   Thanks for stopping by my blog.

                                                                  Love and rainbows,

                                                                     Hugs   Jennifer xx.


Sunday 24 January 2016

Star Touch Fairy.

Hello there, hope you've all had a good weekend.   The weather here has been quite dull and dreary again today but, thank goodness we do not have the snow they have in America!   
Tonight my card features one of my favourite subjects - yes, fairies lol!   The last card I made a few weeks ago was made using Imagination Craft's beautiful 'Fairy Dance' stencil and this one is equally as pretty,  'Star Touch Fairy.'    This was made for Imagination Craft's TV show on Hochanda, earlier this month but did not get shown, so here it is.     I hope you like it.

Fold the ready creased card down the centre crease line, making an 8"x8" base card.   Take the  patterned card and lay the fairy stencil onto it and spread the green and lavender Sparkle Medium over the fairy.   Remove the stencil and leave the image to dry.


When dry, replace the stencil back on the image and spread the silver Sparkle Medium over the star, above the fairy's hand.   Remove the stencil and leave to dry.   Add more stars to the card but not too many.

           
Die-cut the flowers using the Spellbinder's flower dies, from white card and colour each flower centre with green distress ink.   3D the larger flowers.   Matt the patterned card onto a larger piece of white card and then onto a larger piece of lavender paper.   Matt this onto the base card.

    
Glue the flowers to the bottom of the card, adding a few white die-cut leaves.   Die-cut 5 small flowers from some lilac 'fibre' paper  (which was wrapped around a boquet of flowers I received a while back)  waste not want not lol!!!   I do not like to throw anything away, I think I may have a use for in the furure !  hence my untidy craft room lol!!!     Glue one of these to each centre of the larger flowers and glue two to the

    
background.   Glue the small pearl gems to the small flowers and the larger ones to the larger flowers.   That's all from me for the moment.   I will be back in a few days, so please pop back.   Thank you so much for stopping by my blog,   I really appreciate it.   See you all soon.

                                                                Love and rainbows,

                                                                            and

                                                       Happy Crafting, Hugs   Jennifer xx.


Thursday 21 January 2016

Starlight Poppies.

Hello there everyone,

It's time again for another creation from me.   These days seem to fly by at an enormous rate of knots lol!    Hope you've all had a good few days.   It has been so cold here but the snow has gone and it seems to be getting a bit milder thank goodness!   Unfortunately the rain comes along with the mild temperatures, hey ho, it could be a great deal worse.    Must keep smiling, at least the evenings seem to be getting lighter, roll on the Spring!

My card tonight was made for  Imagination Craft's  show on Hochanda TV earlier this month and  uses Imagination Craft's fabulous new Starlight Paints.   Sue and Harvey are bringing out new colours all the time and gorgeous ones they are too,   I need!! them all lol.

Fold the light cream card down the centre crease line, making a 7"x7" base card on which to work.   Take a smaller piece of navy card 6"x6" and lay the poppy stencil onto it.

     
Using a piece of cut n' dry foam, dab the Starlight paints through the design, using the Zinober Gold for the poppies and the  Menthol  & Green for the leaves and stems of the poppies. 


Remove the stencil and matt the card  onto the cream base card.   Die- cut some borders  from navy card, using the Spellbinder's border die and glue around the the edges of the poppies.


From some left over navy die-cut borders, cut 4 pieces, all the same and glue one in each corner.  Well that's this card finished, a very guick and easy card to make.      See you all again in a few days.   Enjoy the rest of your week.  

                                                                 Love and rainbows,

                                                                   Hugs   Jennifer xx.


Monday 18 January 2016

Butterfly Squares.

Hi there everyone,

I do hope you are managing to keep warm and snug during this cold spell we are having.   We still have lying snow, which I'm pleased to say is slowly shrinking lol!    It was so nice to see the sun today, although for a short time only.     

Tonight's card was made for Imagination Craft's  show on the Hochanda  TV channel last December.   As many of you may know, green is a colour I do not use very often but I was quite pleased with the result.   The Imagination Craft's rich orange oxidized Starlight Paint seemed to fit the bill perfectly a good colour combination I think.

Make an 8"x8" base card, by folding the white scalloped card down the centre crease line.   Put the front of the base card into  the  embossing folder and emboss.   Remove from the folder and rub small amounts of the bronze Alchemy Wax over the embossing to highlight the pattern.

    
Matt a piece of bronze coloured card to the front of the base card, leaving a half inch border of the embossed card showing.

   
Take the 'Summer Script Apple' patterned  card and lay the stencil on top, then spread the green Sparkle Medium over the design, using a metal spatula.   Remove the stencil and leave the image to dry.   When dry, cut this into four equal squares and matt onto the bronze card, leaving a small gap between the squares.

   
Die-cut four butterflies from some spare bronze card, using the  Memory Box die and glue one in each corner, putting some silicone glue under the wings to lift them up a little.

   
Using the Spellbinder's flower dies, die-cut one of each size of flower.   Paint with the orange oxidized Starlight Paint from Imagination Crafts, 3D them using silicone glue.   Glue this flower to the centre of the base card.   Finally, glue three orange gemstones to the flower centre.

Well the card is now finished, a fairly quick and easy card to make.  Hope you like it.   Thanks for visiting my blog and I will catch you all again in a few days time.

                                                                  Love and rainbows,

                                                          Happy Crafting,  Hugs   Jennifer xx.


Friday 15 January 2016

Chabby Chic Acetate Butterfly.

Good evening Fellow Bloggers, Friends and Visitors,

Wow! what a fabulous day of demonstrations by Sue from Imagination Crafts and Lisa and lots of special offers on the Hochanda TV channel.   The new colours of Alchemy Waxes are just stunning, as are the new Starlight Paint colours.      Tonight's card was made for the shows today but unfortunately did not get an airing, so many demos to get through lol!     For this card I have used one of the beautiful new rice papers.   These papers are quite amazing, they look so delicate but are so strong, unlike mulberry paper, they do not tear when wet.   I have also used the gorgeous new Golden Pink Sparkle Medium on acetate.

   
Fold the white scalloped card down the centre crease line, making an 8"x8" base card on which to work.   Using the rice paper, decide which part of the design you would like on your card front and cut it out, leaving a border of white card showing.   Fix this to the base card, using double sided sticky tape.

 
Take a piece of white card and the 'butterfly with love' stencil and mask off the border on the stencil, leaving only the main image of the butterfly.     Lay the stencil on the white card and spread the golden pink Sparkle Medium over the large butterfly, using a metal spatula.    Remove the stencil.     Whilst the image is still wet, sprinkle some light blue glitter over the design and leave to dry.

Take some acetate and again, spread the pink Sparkle Medium over the stencil.   Remove the stencil and add some light blue glitter and leave to dry.


When dry, cut out both the butterflies, leaving  tiny border  around the edges,  next to the Sparkle Medium.   Glue the acetate butterfly to the other butterfly, then glue them both to the front of the base card.

   
Add some silicone glue under each wing to raise them up a little.   Well that's this card finished.   Thanks for stopping by my blog.    I will be back in a few days with another creation for you.   See you then.   Have a wonderful weekend.


                                                                  Love and rainbows,

                                                                  Big hugs   Jennifer xx.


Thursday 14 January 2016

Butterfly Circle MDF box for the Hochanda TV. Show.

Good evening everyone,

Hope you managed to watch Imagination Crafts on Hochanda TV tonight.    Four great demonstrations by Sue and Lisa.   Tonight I have another MDF Box to share with you, which I made for the TV shows tonight and tomorrow.   I have used the beautiful new rice paper and Starlight paints, along with some Art Cutz designs.

       
                                                           Below is the top of the box


Paint the inside and outside of the MDF box with 'peanut' MDF paint.   Cover the top of the box with PVA glue and lay the rice paper on top and smooth out, making sure there are no creases.   This rice paper is really quite strong and very easy to use.

    
Paint more PVA  glue over the top of the rice paper,   and around the edges of the lid and bend the rice paper onto the sides of the lid.   (Don't worry as this glue dries clear and leaves a protective surface.)

        
Cut 4 pieces of the 'chicken wire' Art Cutz to fit the sides of the box.   Paint each one with the 'Turquoise'  Starlight Paint and glue these to the sides of the box, using Magi-bond glue.

    
Paint 4 Art Cutz flourishes with the 'Turquoise' Starlight paint, adding a subtle touch of the Inca Gold paint , then glue one in each corner.   Glue 4 holographic, square gems, spread evenly, between the flourishes.

     
Die-cut 5 butterflies using the Spellbinder's die and paint them with the Inca Gold, Dried Rose and the Turquoise Starlight Paints.

  
Glue the butterflies in a circle in the centre of the box lid.   Add some silicone glue to hold the wings in place.     Water down some of the Inca Gold Starlight Paint and dab around the outer edges of the lid, using a piece of cut n ' dry foam.   This gives a very subtle sparkly effect to the surface.

   
Well that's it for tonight folks, I must add this to my Pinterest page, so I'll be back soon, hope you will too.   Many thanks for visiting my blog, hope you may have found some inspiration for your creations.   Please don't forget Sue will be on Hochanda TV. tomorrow (Friday) at 9am.  12pm.  4pm. and 7pm, so set your recorder to record  if you  are unable to tune in.   Bye for now.

                                                                  Love and rainbows,

                                                                    Hugs   Jennifer xx.