Followers

Monday 26 December 2016

Thank You Orchids.

Good evening Followers, Friends and Visitors,

I do hope you enjoyed your Christmas celebrations with your family and friends.   We had a very enjoyable Christmas Day with our family.    The turkey has all but gone now, maybe curried turkey tomorrow lol!   Before I begin, I would  like to welcome my newest Follower, Margaret,  I hope you enjoy your visits and thanks for following.

Tonight I would like to share a card I made for Sue & Harvey of  Imagination Crafts in November this year.   I have used their very pretty Orchid Trio stencil, Starlight paints and distress inks.


Matt a square of black card onto the 7"x7" ivory coloured card, leaving  half an  inch of the base card showing.   Matt a piece of peach paper onto the black matt, leaving a very small border of black showing.


Using a black ink pad, stamp the sentiment on the right-hand  side of the peach paper.   Die-cut the butterfly, using the Spellbinder's die and then paint with  the antique gold Starlight paint.   Die-cut a body from black card, using a Memory Box butterfly die and glue to the butterfly, then glue to the top right corner of the peach paper.


Die-cut one small, one medium and one large flower using the Sizzix flower die.   Paint the flowers with the orange oxidized Starlight paint.   Glue these to the bottom right-hand corner.


Glue three small black gemstones to the bottom right.


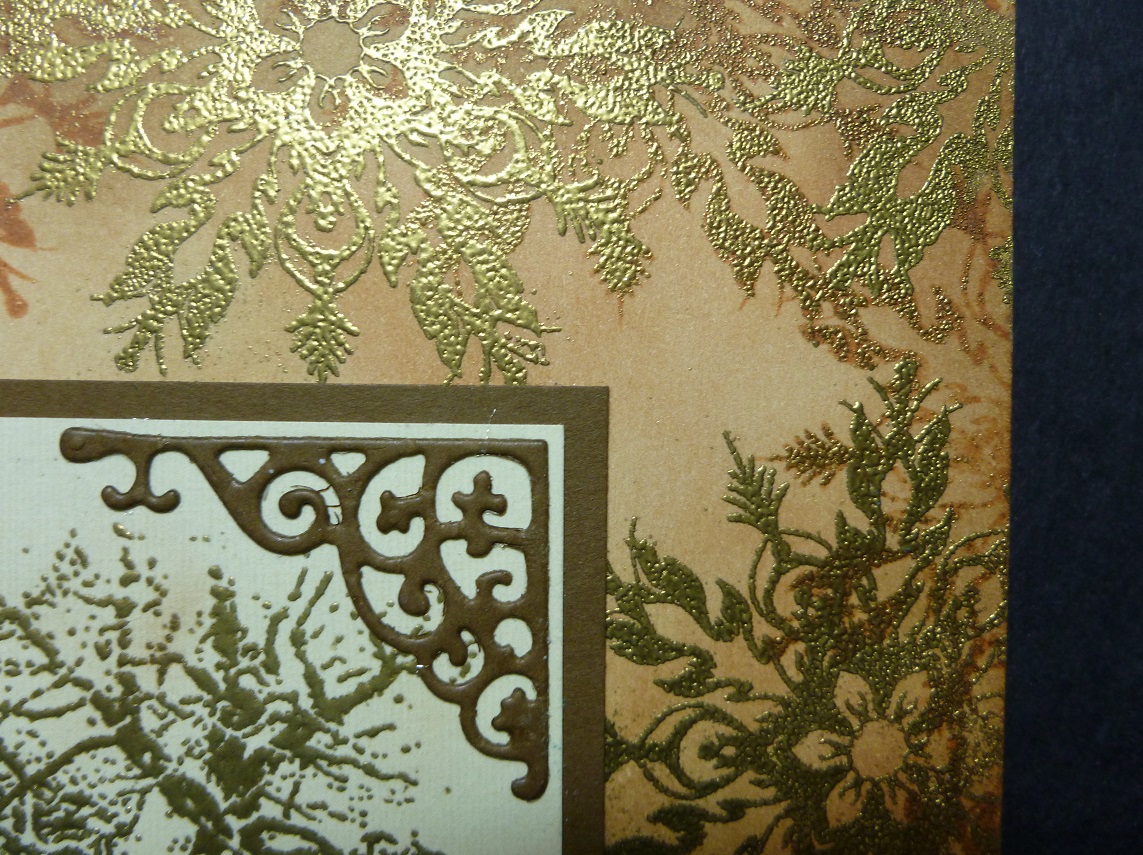
Cut a piece of white card and colour with distress inks :- scattered straw and forest moss, using a blending tool.   Lay the Orchid trio  stencil on top and using a dabbing motion, dab the orchids  with the orange oxidized and topaz Starlight paints, using a stencil brush.     Trim this down, cutting at an angle  on the two top corners.


Matt this onto a piece of black card, then matt onto the left of the base card.    Voila! card is now finished.   Many thanks for stopping by my blog, hope you've enjoyed your visit.   Enjoy the rest of the Christmas Holiday and I will be back quite soon.   Have fun and be happy.

                                                                  Love and rainbows,

                                                             Christmas Hugs  Jennifer xx.


Thursday 22 December 2016

Summer Flowers.

Hi there, Followers, Friends and Visitors,

Well, not long now until Santa arrives, if you've been good of course lol!   he could be bribed with a glass of sherry and a mince pie though, not that you would need to do that of course, only saying ha! ha!   me ? well I think I have been reasonably good!     This will be my last card until after Christmas.    I decided to bring a breath of Summer to my blog  tonight.

    
Trim a half an inch of card from one of the long edges of a piece of white A4 card and fold the card in half down the centre, making a portrait style base card on which to work.   Round off each corner with the corner rounder punch.

Cut a piece of flower patterned paper (this was given free with the 'Making Cards Magazine).  Cut it slightly smaller than the base card and punch each corner with the corner rounder punch.   Matt this onto the base card.

Cut out and punch corners from a piece of white card, cut half an inch smaller than the patterned paper.   Matt this onto the base card.


Using a smaller piece of matt black card with the corners rounded, put it into the embossing folder and emboss.    Matt this onto the base card.      Take another piece of black card and emboss using the same folder.   Cut out each flower and the leaves, then paint.   I used Imagination Crafts  Vintage Pearly paint palette but you could also use Starlight paints of your choice, which would give an equally sparkly effect.

      
Using silicone glue, fix them onto the original embossed images in the correct positions.   Add some black Stars Sparkle Medium to the flower centres.   Draw over the stems with a green glitter pen.

   
Die-cut a label from white card and colour with the Victorian Velvet distress ink whilst it is still in the die, which will leave the outside edge white.   Using a black ink pad, stamp 'Hello' in the centre.

    
Die-cut the butterfly from white card, using the Spellbinder's die and fix the label to the top right, using sticky
foam pads.   Glue the butterfly just below the label.    The card is now finished.  

All that remains is for me to do, is to  wish you all a wonderful Christmas and all good wished for a happy, healthy 2017.    I will be back just after Christmas.    Thanks so much for stopping by my blog, I hope you have enjoyed your visit.

                                                                 Love and rainbows,
                                                                 Hugs   Jennifer xx.


Friday 16 December 2016

A Little Bit of Magic.

 Good evening Followers, Friends and Visitors,

Hope you've all had a good week.   Are you all ready for Christmas ?  I still have a few cards to get in the post !!   behind as usual lol.     I have been playing with another three of my new Lavina Stamps, really loving them!     I thought I would share my latest make using them.   The pixie stamp is so sweet and is called  'Sky,'   the sentiment is called  'Believe in Magic' and the other, 'Fairy Web,' all beautifully designed.

I have also used some White Gold Starlight Paint from Imagination Crafts, to give a subtle sheen to the card.

    
Matt a square of black card onto the 6"x6" white scalloped base card, leaving a small border of white showing.

Take a slightly smaller piece of white card  and colour it, using the Forest Moss, Peeled Paint, Shabby Shutters,  Shaded Lilac, Scattered Straw and Victorian Velvet Distress Inks.   Using a tiny amount of the White Gold Starlight Paint and water, mix together, then spread this over the background colours.

  
Stamp the 'Fairy Web' in each corner, using a black ink pad.  Stamp the sentiment at the top, again using a black ink pad.

   
Stamp the Pixie 'Sky', sitting on top of the webs, again using a black ink pad.  


Lightly brush more watered down gold Starlight paint across the card, then fix this to the base card.

   
Add a touch thicker mix of water and gold paint to the pixie's wings, being careful not to cover over the design lines on the wings.

Glue a green ribbon bow to the centre top  of the card.   There we have it, the card is now finished, a very quick card to make.    Have a good weekend and I will be back soon.

                                                                   Love and rainbows,

                                                                     Hugs   Jennifer xx.


Sunday 11 December 2016

Let it Snow......

Hi there Followers, Friends and Visitors,

Hope you have all had a good weekend.   Well not long to wait for that special visit from Santa lol!  before we know it, Christmas will be here.    Speaking of  Christmas, my card for tonight features that lovable fellow,  Santa Claus!    This is great for one of those last minute cards which arrive unexpectedly!   I have used Imagination Craft's fabulous Santa Sleigh Art stamp.


Working on a 7"x7"  white card, die-cut 3 corners using the Memory Box snowflake corner die.   Glue them to the right-hand edge og the base card.   Matt a piece of black card down the centre and to the left a little, having glued some ribbon down the left-hand side of the black card first,  securing on the back of the card.


Take some white card and colour it with the Mixed Media Inks - light blue and light purple, then stamp Santa's sleigh onto it, using a Versamark pad and heat emboss with white embossing powder.


Stamp Santa's sleigh again, on top of the white embossing but place your stamp slightly below the original image, using a Versamark pad, then heat emboss with black embossing powder.

     
Die-cut this using the scalloped oblong die, leaving Santa out of the right-hand edge of the die, so he does not get cut off.  To do this, cut around part of the sleigh and Santa with scissors and when you lay the die on the image, lift the part you have just hand cut, on top of the cutting edge of the die,  before putting into the die-cutting machine.


Glue this to the base card.   Die-cut a white circle (for the moon)  and stamp some snowflakes around the edge, using a black ink pad.   Stamp the sentiment in the centre, then glue above Santa's sleigh, fixing another snowflake corner, cut from white card, behind the moon.

    
Stamp 'Seasons Greetings' on the bottom of the black card, using a Versamark pad and heat emboss with white  embossing powder.

Glue a white, satin organza ribbon to the left-hand side.

     
The card is now finished,  by double embossing it looks as though the snow is lying on the sleigh.   That is all for now my friends, I will be back again soon, take care of yourselves.

                                                                   Love and rainbows,

                                                                     Hugs   Jennifer xx.


Thursday 8 December 2016

Ice Skating.

Good evening,

Not such a good day here today, the wind has thankfully gone but it has rained most of the day.   The sun shone for a few minutes, then disappeared again lol!.   My card tonight was made for Sue & Harvey of Imagination Crafts,  for their show on Hochanda T.V.  in November, not sure if it got an airing as we had  
no T.V. signal that day for some reason, so I did not see any of the shows, most annoying lol!  the one day I really wanted to watch, out of many and we had no signal! just my luck lol!      I have used two of their beautiful Art stamps - Skaters and  Snowflakes.   Hope this gives you some ideas for those last minute Christmas cards lol!

   
 Working on a 7"x7" ivory base card, colour around the edges with the Tea Dye, Antique Linen & Vintage Photo Distress Inks, using a blending tool.

Next,  using one of the larger snowflake stamps  and the vintage photo distress ink pad, stamp half a
snowflake around the card edges.

   
When dry, stamp the snowflake around the edges again, as before but this time,  using a Versamark pad, then heat emboss with gold embossing powder.

    
Stamp the skaters onto a piece of ivory card, using the Versamark pad and heat emboss with gold embossing powder.   Matt this onto onto a slightly larger piece of brown card,  then glue to the centre of the base card.


Die-cut four corners from brown card, using the Tattered Lace corner die, then glue one in each
corner of the skater's matt.


Glue an ivory organza and satin ribbon bow to the top left of the card.

   
That's all from me tonight my Friends,  must pop over to my Pinterest page to add this card to my board, then some commenting to do.   See you all soon, have a wonderful weekend, just one more day to go lol!
Take good care of yourselves.

                                                                 Love & Rainbows,

                                                                  Hugs   Jennifer xx.


Monday 5 December 2016

Three Little Kittens.

Hello Everyone,
Goodness me, it has been so.....cold here today but at least it has been dry.   The heavy frost overnight has not given at all today!   warmer weather on the way hopefully in a day or so.   My card tonight was made for Sue and Harvey of Imagination Crafts in August this year.   This is for all my friends who love their little fur babies lol!   I have used  Imagination's  'Three Cats' stencil  and a fine liner black pen.

   
Fold the white card down the centre crease line, making a 7"x7" base card.   Matt a square of red shiny card onto it, leaving a half inch border of the white card  showing and lay the stencil on top.

Draw around the outline of the cats using the fine liner black pen, then remove the stencil.

    
Doodle some patterns on each cat, again using the black pen, colouring in some parts of the patterns in black.   Add a little shading, using a  pencil.

      
Die-cut one medium and three small roses from spare red card to match the matt, using the Sizzix rose dies.


Glue a small rose to each of the cats and the larger rose to the bottom right corner.   Matt the cat images onto the red card on your base card.

    
Using the heart stamp and a black ink pad, stamp one on each edge of the base card.   Lastly, add a green satin ribbon bow to the top left corner.

   
That's all from me for tonight my friends.   Thank you for stopping by my blog and I will be back again quite soon.   Enjoy your week,  keep well and be happy, see you soon.

                                                                  Love and rainbows,

                                                              Crafty Hugs   Jennifer xx.


Sunday 4 December 2016

Midnight Meanderings.

Hi there  Followers, Friends and Visitors,

Hope all is well with you and you have enjoyed your weekend.   Before I begin with my step by step guide I would like to welcome my newest Follower, Jane Royston.   Thank you for following my blog Jane, I do hope you enjoy your visits.

Well,  onto tonight's card.   As you know I love stamps, particularly ones of fairies, pixies etc.,  so Lavinia stamps are some of my favourites.   I have a few new ones and just had to have a play with them.   For this card I have used Lavinia stamps  the rabbits (which I adore, so cute') and the three tall trees which I have had for some time.   The 'let it snow' stamp was given free with a craft magazin and.  I have used Imagination Craft's Diamond Sparkle Medium, T.H. Distress inks and a stars stencil by Imagination Crafts.   

   
Matt a smaller piece of black card onto a white scalloped 6"x6" base card, leaving a small white border showing.

Cut out a large circle mask and lay it where you want the moon to be.   Colour the sky with the Stormy Sky,  Dusty Concord and a little Hickory Smoke Distress Inks, using a piece of cut 'n' dry foam, then remove the mask.   Colour the moon slightly with the inks.

Using a black ink pad, stamp the trees  on top of the moon.

    
Lay the stars stencil on the sky and spread the diamond Sparkle Medium over the stars, using a metal spatula.   Remove the stencil and leave the image to dry.

   
Cut three pieces of white card for the bank side and draw a black line along the tops, then dot with a fine  liner black pen.   Add some diamond Sparkle Medium along the top edges of the bank side, with your finger.   Glue the bank sides to the base card, just below the base of the trees.

Stamp the rabbits with a black ink pad, cut out and glue to the bank side on the right of the base card.

      
Stamp again and 3D the  sitting rabbit, then glue the other near the bottom right of the base card, making a group of 3 rabbits.  

    
Stamp again but this time, cut out one rabbit only and glue it to the bottom left of the base card, using silicone glue.


Using your finger, just rub a small amount of the diamond Sparkle Medium to the right hand side of the moon.   Stamp 'let it snow' using a black ink pad, on the sky, between the stars.

   
Add some  moon highlights to the rabbits using a white pen.   Well that's all my friends.   Thank you for taking the time to visit my blog, I really appreciate it.   I'll be back again soon, so please pop back.   Take care of yourselves and stay warm and snug during this cold spell.

                                                                  Love and rainbows,

                                                                   Hugs   Jennifer. xx.


Friday 2 December 2016

Three Trees Christmas Card.

Good evening Followers, Friends and Visitors,

 Happy Friday, yeah! it is the weekend again, time to relax and the weather forecast looks reasonably good.   How are you getting on with your Christmas shopping?   I am behind as usual lol!     I have made some Christmas cards and I would like to share one of them with you tonight.   I am a stamp addict, always have been and always will be, so when out shopping I cannot resist buying a new stamp lol!    My card tonight was made using a Woodware stamp which appealed to me as the design is modern and simple, yet effective.

    
Fold a ready creased white scalloped 6"x6" card in half, making a base card on which to work.   Put the front of the card only, into the embossing folder, (this was given free some time ago with the Cardmaking & Papercraft Magazine)  and emboss.    Colour the card front with the peeled paint, rusty hinge, tea dye, forest moss and walnut stain distress inks,  leaving the centre lighter than the rest,  finishing off by colouring the card edges with the rusty hinge distress ink.

Using a Versamark pad, stamp the trees onto the centre of the embossed card front, then heat emboss with gold embossing powder.

   
Stamp  'Christnas Wishes' using the Versamark pad onto the top of the card, just above the trees, then heat emboss with gold embossing powder.

    
Stamp the trees again onto some dark green card, medium green and light green card using the Versamark pad and heat emboss with gold embossing powder.

Cut out the 'farthest away' tree from dark green card.   Cut out the 'middle' tree from the medium green card and finally, cut out the 'nearest' tree from the light green card.

Paint the lights on the trees with some Imagination Craft's Orange Oxidised Starlight paint.   Layer the three trees on top of one another, using silicone glue, onto the original stamped image.


Add dots of the orange Starlight paint to the embossed dots on the snowflakes and the  dots around the card edges.


The card is now finished, I do hope you like it.   Thank you all for visiting my blog, I really do appreciate each one of you and if you have kindly left me a comment, thank you again.   Enjoy a relaxing weekend.   See you all again soon.

                                                                  Love and rainbows,

                                                                    Hugs   Jennifer xx.