Followers

Wednesday 30 September 2015

The Earth Laughs in Flowers.

Hello there Followers, Friends and Visitors,

Well, how lucky are we, yet another beautiful day, positively hot, blue skies and wall to wall sunshine!   I have been out in the garden again, tidying up our fruit garden.   Gooseberries and strawberries  finished fruiting now but the plums are coming along nicely.   This sunshine is ripening them very quickly.   We don't have as many plums as we had last year but not grumbling.    Lots of red admiral butterflies in the garden over the last few days but a lack of wasps !!   which I have to say,  I'm quite pleased about as I don't like them having been stung in the past.   Tonight I have a card for you that I made for my FB friend's charity.   For this I have used an Indigo Blue stamp I bought a week or so ago.   I have also used Imagination Crafts fabulous new Starlight paints to colour the image.

Before I explain how I made this card, I would like to welcome my newest follower of my blog, Sheila Ridley.   I do hope you enjoy your visits and thank you for being a follower.

Take an A4 piece of cream linen card and trim half and inch from one long edge, then fold in half to make an A5 sized card.  Using a black Archival ink pad,  stamp the tulip towards the left side of the card.

      
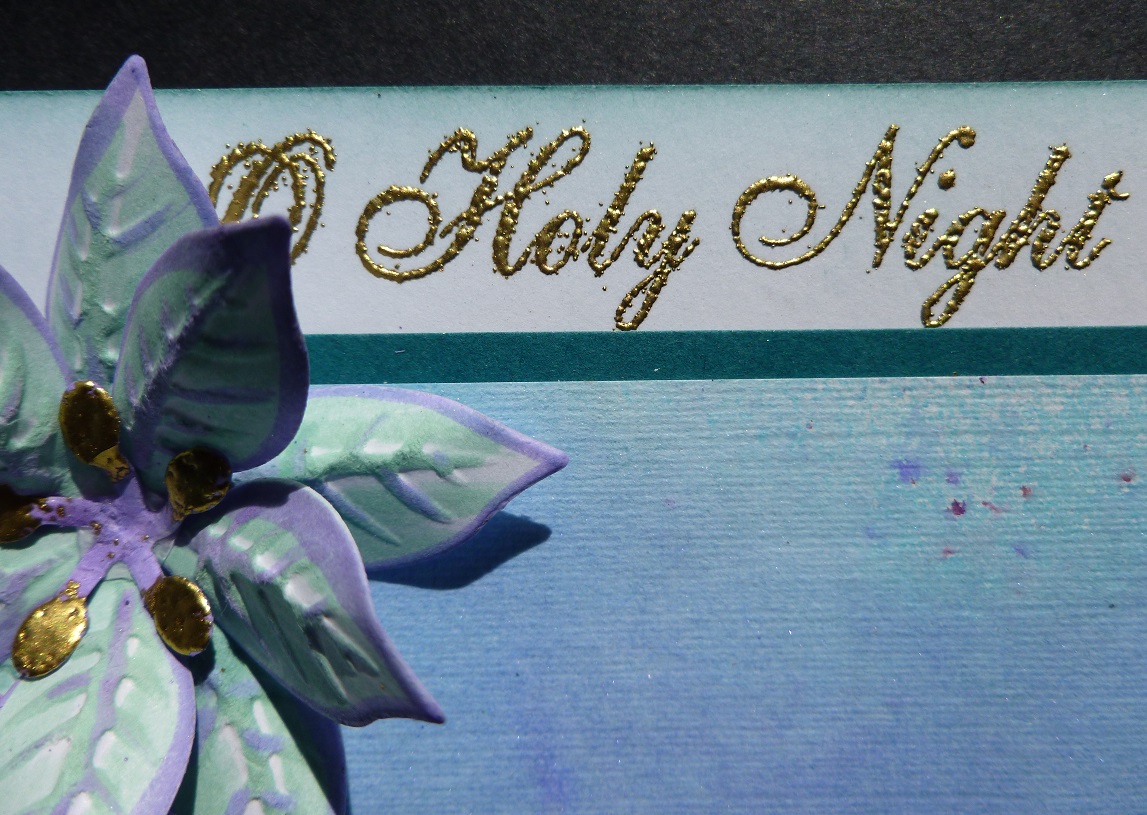
Stamp the sentiment to the right of the tulip.   Paint the tulip with watered down cyclamen  and the stem with menthol  Starlight paints. 


 These paints leave a beautiful sheen which unfortunately does not show up on this photograph.

      
Stamp the lace border at the top of the card, using the black inkpad and at the bottom, approximately three quarters of an inch from the bottom of the card.


Glue a row of pink sequin hearts along the bottom, below the black stamped lace border and three hearts above the sentiment.

Well that's all from me tonight, have a wonderful sun filled day tomorrow and I will be back again soon.

                                                                 Love and rainbows,

                                                                 Big hugs   Jennifer xx.


Monday 28 September 2015

'Snowflake Flurry Snowman.'

Hi there Fellow Bloggers, Friends and Visitors,

How are you all tonight ???? well I hope.   What a lovely day it has been again today.  Spent some time in the garden cutting down plants that have finished flowering.   No time in my craft room today!   Tonight I would like to share another card I made for a friend's charity.   The snowman stamp I have used is from Imagination Craft's Christmas decoupage stamp sets.   I just love this happy little snowman lol!


Fold a white scalloped card in half down the centre crease line, making an 8"x8" base card.   Take a piece of white card, slightly smaller than the base card and put into the snowflake embossing folder and emboss.
Colour with distress inks, then matt onto a base card.      Take another piece of white card and paint with the 'Lagoon' MDF Paint.   Next colour over the top with seedless preserves distress ink.   When dry, lay the  'snowflake flurry' stencil on top and spread the 'diamond'  Sparkle Medium over the design.

    
Remove the stencil and leave the image to dry.   Matt this onto a slightly large piece of teal card, then onto a slightly larger piece of white.  Matt this onto the base card.

  
Cut out a scalloped oval using the turquoise card and the Spellbinder's die and put it into the snowflake embossing folder and emboss.   Rub a small amount of 'diamond' Sparkle Medium over the raised surface, then glue to the centre of the base card.

 
Stamp the snowman three times using a black ink pad and colour with the 'pearly paint palette.'    Cut out   and glue one image to the scalloped oval and 3D the hat and scarf onto the main image, using silicone glue.

    
Add some 'diamond' Sparkle Medium to the trim and the bobble on his hat.   Glue a purple satin bow to the bottom right corner.

  
Colour three pieces of candy using the 'blue' Starlight paint and glue them to the top left of the card.   Well that's all from me, enjoy the rest of your week and I will be back soon.

                                                                   Love and rainbows,

                                                        Happy crafting.   Hugs   Jennifer xx.


Saturday 26 September 2015

Chequered Roses.

Good evening Peeps,

The card I have for you tonight has not been shown on my blog before.   I did share a very similar card some time ago, which used one of Imagination Craft's patterned background cards.   The background on this card was made by myself, using  Imagination Craft's Silkies, gorgeous paints which leave a beautiful, subtle, silky sheen.

Make a base card from black card stock.   Take a piece of white card, slightly smaller than the black and put through an embossing machine, along with the Cosmic Swirls stencil and emboss.    Colour this with distress inks and glue to the base card.   The border around the edge of this card was drawn free hand, using  a fine black pen.  

     
Take an oblong piece of white coated card, large enough for the rose stencil to fit, then colour with the Silkies paints.  

When dry, lay the stencil on top and draw around the design with a black pen.   Leave to dry.  ( The ink smudges very easily on this coated card, so it takes quite a while to dry.   I work with a piece of paper 
under my hand and worked down from the top.)

    
Add patterns of your choice to the roses and stems, using a black pen.   Then add some white highlights, using a white pen.

    
Using a black pen, draw a hillside with fields in the distance and add your patterns to them.    Matt this onto a slightly larger piece of white card, then onto a larger piece of black.   Matt this onto the embossed card.

Well that's this card finished.   I really did enjoy making this card.   Doodling is very relaxing and gives quite an interesting effect,  another way to use a stencil.

Have a lovely restful Sunday and I'll be back soon.

                                                                 Love and rainbows,

                                                                Big Hugs   Jennifer xx.  


Thursday 24 September 2015

Figgy Pudding this Christmas.

Hi there Peeps,

Hope you've had a good week so far.   The weather looks set fair for this weekend and beyond I'm pleased to say.   Our gorgeous little Grandson did an 8 mile sponserd  walk today.   They  walked by the road for the first 4 miles, then along the riverside, through the fields for the second half and it rained most of the time, with a chilly wind.     His shoes, socks and trousers were completely soaked through lol!    They took a packed lunch with them.   So good for them, all that fresh air and exercise !!

I meanwhile,  spent time in my craft room, my favourite room in the house lol!   A few weeks ago I purchased a couple of stamps which just  jumped out at me  and into my shopping basket lol!   I have finally had some time to have a play with them.   Tonight's card uses one of these stamps, a Christmas pudding.

     
Fold the white card in half down the centre crease line, making a 6"x6" base card.   Matt a piece of dark green holly paper onto the base card, leaving a border of the white card showing.

Cut different shaped pieces of various patterned papers and glue in the positions you  feel look right.   Take some white card and using a black ink pad, stamp the pudding and the flourish border.

   
Stamp the various sections of the pudding onto different patterned papers, using a Versamark pad and heat emboss with gold embossing powder.   Cut the sections out and fix to the original image you stamped onto the white card.   Fix  a piece of white paper embossed with the snowflake embossing folder and glue across the patterned papers on the base card.

Stamp and heat emboss the flourishes onto green paper, trim around the flourishes and glue to the original image.

    
Stamp and cut out the cream on the top of the pudding, using more white card and heat emboss with gold powder.    Stamp and cut out the cherry from red paper.   Glue the cream and the cherry to the  pudding, using silicone glue to give dimension to the card.   Stamp the large and small buttons onto white card using Versamark and heat emboss with gold powder.   Cut out and glue the larger button to the top right and the smaller, to the bottom left, on the white embosssed paper.   Glue the pudding to the base card.

     
Stamp the 'Have a holly jolly Christmas' and 'Oh bring us'............ onto some white card, using the Versamark pad and heat emboss with gold embossing powder.   Trim around these sentiments and edge with some red distress ink.

   
Glue these to the base card, top left and bottom right corners.   3D the holly leaves on the pudding and add a dot of white pen to the cherry on top of the pudding.

      
Have a good couple of days and I'll see you soon.

                                                                    Love and rainbows,

                                                                  Big Hugs   Jennifer xx.


Tuesday 22 September 2015

Birds in a Gilded Cage.

Hi there Followers, Friends and Visitors,

Tonight I have a card to share which I made in March 2015.   For this I have used Imagination Craft's  Sparkle Mediums, a patterned panel card and the gorgeous 'birds in a cage' panel stencil.

Make a base card from white card stock.   Matt a slightly smaller piece of green card onto the white.   Take the patterned panel card and lay the 'leafy' panel stencil on top.   Mask off all the dots using masking tape and spread the hunter green Sparkle Medium over the design, using the metal spatula.   Remove the stencil and leave the image to dry.

   
Take the masking tape off the stencil and wash and dry the stencil.   Replace the stencil  over the design and carefully mark where the dots are with a pencil, then  glue purple gems in place of the dots.   Lavender Sparkle Medium could be used in place of the purple gems, if you prefer.

    
Take a piece of acetate and lay the birdcage stencil onto it, near the right hand edge of the acetate.   Spread the ruby gold Sparkle Medium over it.   Remove the stencil and leave the image to dry.   When dry.  fix the acetate onto the  green card  and add spots of  glue to the top an bottom right corners, as this will be hidden from view by the die-cut corners.    Glue the leaf panel card to the left of the card, on top of the acetate.

   
                               Glue a ribbon bow to the top of the birdcage using Magi-bond glue.

Die-cut two corners using the corner die, from another piece of patterned card, the darker coloured corner to match the top of the lilac panel card and the lighter to match the bottom.  

  
Glue these die-cut corners, one at the bottom and the other to the top right hand corners.   Well that's this card finished.

See you all again in a couple of days.

                                                                     Love and rainbows,

                                                             Happy crafting, Hugs   Jennifer xx.


Sunday 20 September 2015

Robin Redbreast.

Good evening Peeps,

Hope you have all enjoyed your weekend.   A whole new week ahead of us.   Le's hope we all have a good one.   Tonight I have a card  for you which was made for Imagination Craft's debut show on Hochanda T.V.   on the 10th. September.   I have used their 'singing robins' stencil but have used it in a different way, hope you like it.

Fold the ready creased white card down the centre crease line, making a 7"x7" base card.   Matt a smaller piece of dark green card onto the white.   Cut a smaller square of white paper and put it into the snowflake embossing folder and emboss.

   
Fix a two and a quarter  inch wide strip of red card across the white embossed paper.   Next matt a narrower piece of green card in the centre of the red, securing some white lace across the centre and securing on the reverse.   Glue this to the base card.

    
Die-cut some pine branches using the Marianne design die and colour them with the green Starlight paint.   Glue these to the front of the card, branches reaching up to the top left and bottom right corners.

      
Lay the robin of your choice from the 'singing robins' stencil onto white card and draw around the outline using a green pen.   Remove the  stencil and doodle some patterns onto it, using  green  and  red pens.

   
Trim around the robin, making a square and matt onto a slightly larger green square, then onto a larger piece still, of red card.   Glue this across the white lace.   Add a red gem to each corner of the white square and a green gem on his hat bobble.

     
Glue two red gems to the top right and three to the bottom left corners.   Add a silver ribbon bow below the robin image.

Stamp the sentiment using a Versamark pad onto some white card and heat emboss with green embossing powder.    Die cut a circle around the sentiment.     Matt this onto a larger circle of red card and fix to the base card.   Glue two green gems to the sentiment.

    
Card finished.   I'll be back in a couple of days with another creation.   Have a good week everyone and be happy.    See you all soon.

                                                               Love and rainbows,

                                                                  Hugs Jennifer xx.


Friday 18 September 2015

Happy Silver Wedding Anniversary.

Good evening Peeps,

Hope you are all looking forward to the weekend, sounds like the weather may be quite good.   Tonight I have a card for you which uses Imagination Craft's  Silver Sparkle Medium, silver satin card  and their 'Happy Anniversary' stamp.

Make a base card from white card.   Take a smaller piece of  blue/grey pearlised card and wrap a piece of silver ribbon across the centre and secure on the reverse of the card.


Matt this onto the base card.   Take a piece of the blue/grey pearlised card and put through an embossing machine along with the metal Celtic stencil and emboss.   Not sure of the make of this stencil, sorry.

Stamp 'Happy Anniversary' with the Versamark pad and heat emboss with silver embossing powder.   Lay the stencil back on the embossed circle and spread the silver Sparkle Medium over it, using the metal spatula.   Remove the stencil and leave the image to dry.

   
Trim this to a four and a quarter square and matt onto a piece of Imagination Craft's silver satin card, leaving a small border of the silver showing.

   
Matt this onto the base card.   Make six roses using the silver satin card and glue these around the Celtic circle. 

   
That's all from me for now my friends.   I'll be back with another creation in a couple of days.   Enjoy your weekend.

                                                                   Love and rainbows,

                                                                  Big Hugs   Jennifer xx.


Wednesday 16 September 2015

Road to Bethlehem.

Good afternoon Folks,

Thought I would post this card now instead of later this evening.   What a glorious day it has turned out to be here.   After a chilly dull start, the sun appeared with beautiful blue skies, a lovely Autumnal day.   Hope it is as nice where ever you are too.

Today I have another card which was made for Imagination Craft's debut show on Hochanda last week.


Fold the white card in half down the centre crease line, making a 7"x7" base card.   Stamp the text with Versamark and heat emboss with gold embossing powder around the edge of the card.


Colour the edges of the card with evergreen bow and tumbled glass distress ink.   Next matt a smaller piece of emerald green card onto the base card, leaving approximately a half inch border of the white base card showing.


When dry, lay the stencil on top and using some cut 'n dry foam, dab the Versamark through the design.   Remove the stencil and add the gold, turquoise and purple embossing powders.   Shake off the excess powder and heat emboss.   Matt this onto the base card.

Die - cut four small poinsettias and two large.   Colour these with the Marvy Le Plume pens.   Glue two small ones together and glue to the bottom right corner.


Make up the other two flowers using one large and one small flower.   Glue these to the top left of the base card.


Colour the stamen and add some Versamark to the tips of the stamen and cover with gold embossing powder, then heat emboss.   Glue these to the flower centres.

Well that's all from me today, catch you all in a couple of days time.   Enjoy the rest of your week.

                                                                 Love and rainbows,

                                                           Happy crafting !   Hugs   Jennifer xx.


Monday 14 September 2015

Singing Robins.

Hi there, I'm back and  I have a Christmas card for you.   This is a very quick and easy card to make, using Imagination Craft's  Sparkle mediums and their really cute' singing robin' s stencil.

Fold the ready creased white card down the centre crease line to make a 7"x7" card.   Matt a smaller piece of green card onto the base card and then matt a smaller piece of red card onto the green.

   
Take the snowflake patterned card and lay the stencil onto it and spread the three Sparkle Mediums  over the design, using the metal spatula.


Spread the red Sparkle Medium over the robin's breasts and the Santa hats.   Remove the stencil and leave the image to dry.


When dry, fix this to the base card and hey presto, card finished!!   This is a quick card to make if you are making quite a few.   The longest time is waiting for the Sparkle Medium to dry but they can be drying whilst you are doing the next card, or you could put them on top of a radiator to dry.

See you again in a couple of days.  Bye for now and thanks for visiting my blog.

                                                             Love and rainbows,

                                                           Big Hugs    Jennifer xx.        


Saturday 12 September 2015

Another Deer Tea Light made for the Hochanda TV Craft Channel.

Good Saturday evening,  hope you've had a great weekend so far.   Mine has been quite a quiet one for a change.     I've spent some time this afternoon in my craft room, just playing and experimenting with my fabulous Imagination Craft's Starlight Paints.

 I would like to share another MDF tea light with you tonight,  this time it is the beautiful deer tea light and I have chosen to use the dark orchid, antique gold and  the green Starlight paints.

  
Begin by painting all five pieces of the mdf kit with a coat  of  Imagination Craft's  white Gesso.   Next, coat with the pebble shore mdf paint.   Do not paint the tabs or let the paint get into the slots, or they may not fit
 together  when you come to assemble the tea light.   I masked off the tabs with masking tape before painting, makes life a lot easier lol!     Leave until dry.

Next take the two solid pieces which form the sides of the tea light and lay the daisy curl stencil onto them  and spread the forest green Sparkle Medium over the stencil, using a metal spatula.   Remove the stencil and leave the images to dry.   These will be on the insides of the tea light as below.

      
Whilst they are drying, begin painting the design on the other two sides,  .the branches and the squirrel with antique gold,   the  birds and the deer with dark orchid and the leaves, grass and the inside of the base with green Starlight paints.   Leave to dry, which does not take long as these paints dry really quickly.


Now to decorate the outsides of the two solid pieces.   Die-cut two ferns from white card, using the Memory Box die and colour with the green and antique gold Starlight Paints, then glue one on the outside of each solid piece. 

    
Now all that remains to be done is to slot all the parts together and insert a tea light.  ( I use a wax candle with is battery operated - no risk of fire or accidents ! )    Switch on, turn the lights down and enjoy!

Thanks so much for taking the time to stop by my blog, much appreciated.   Have a peaceful, relaxing Sunday and I will be back again in a couple of days, hope you will be too!

                                                                  Love and rainbows,

                                                                  Big hugs   Jennifer xx.